Jack’s Story
HomeThe BookReviewsAboutGalleryBuy the Book

Companion to the book and audiobook

Photographs, letters, and maps

Every image from Jack’s Story, gathered in the order the story tells them. The photographs, wartime documents, and battle maps an audiobook cannot show you.

Heard a scene and want to see it? Find it by chapter below.

✦

Front Matter

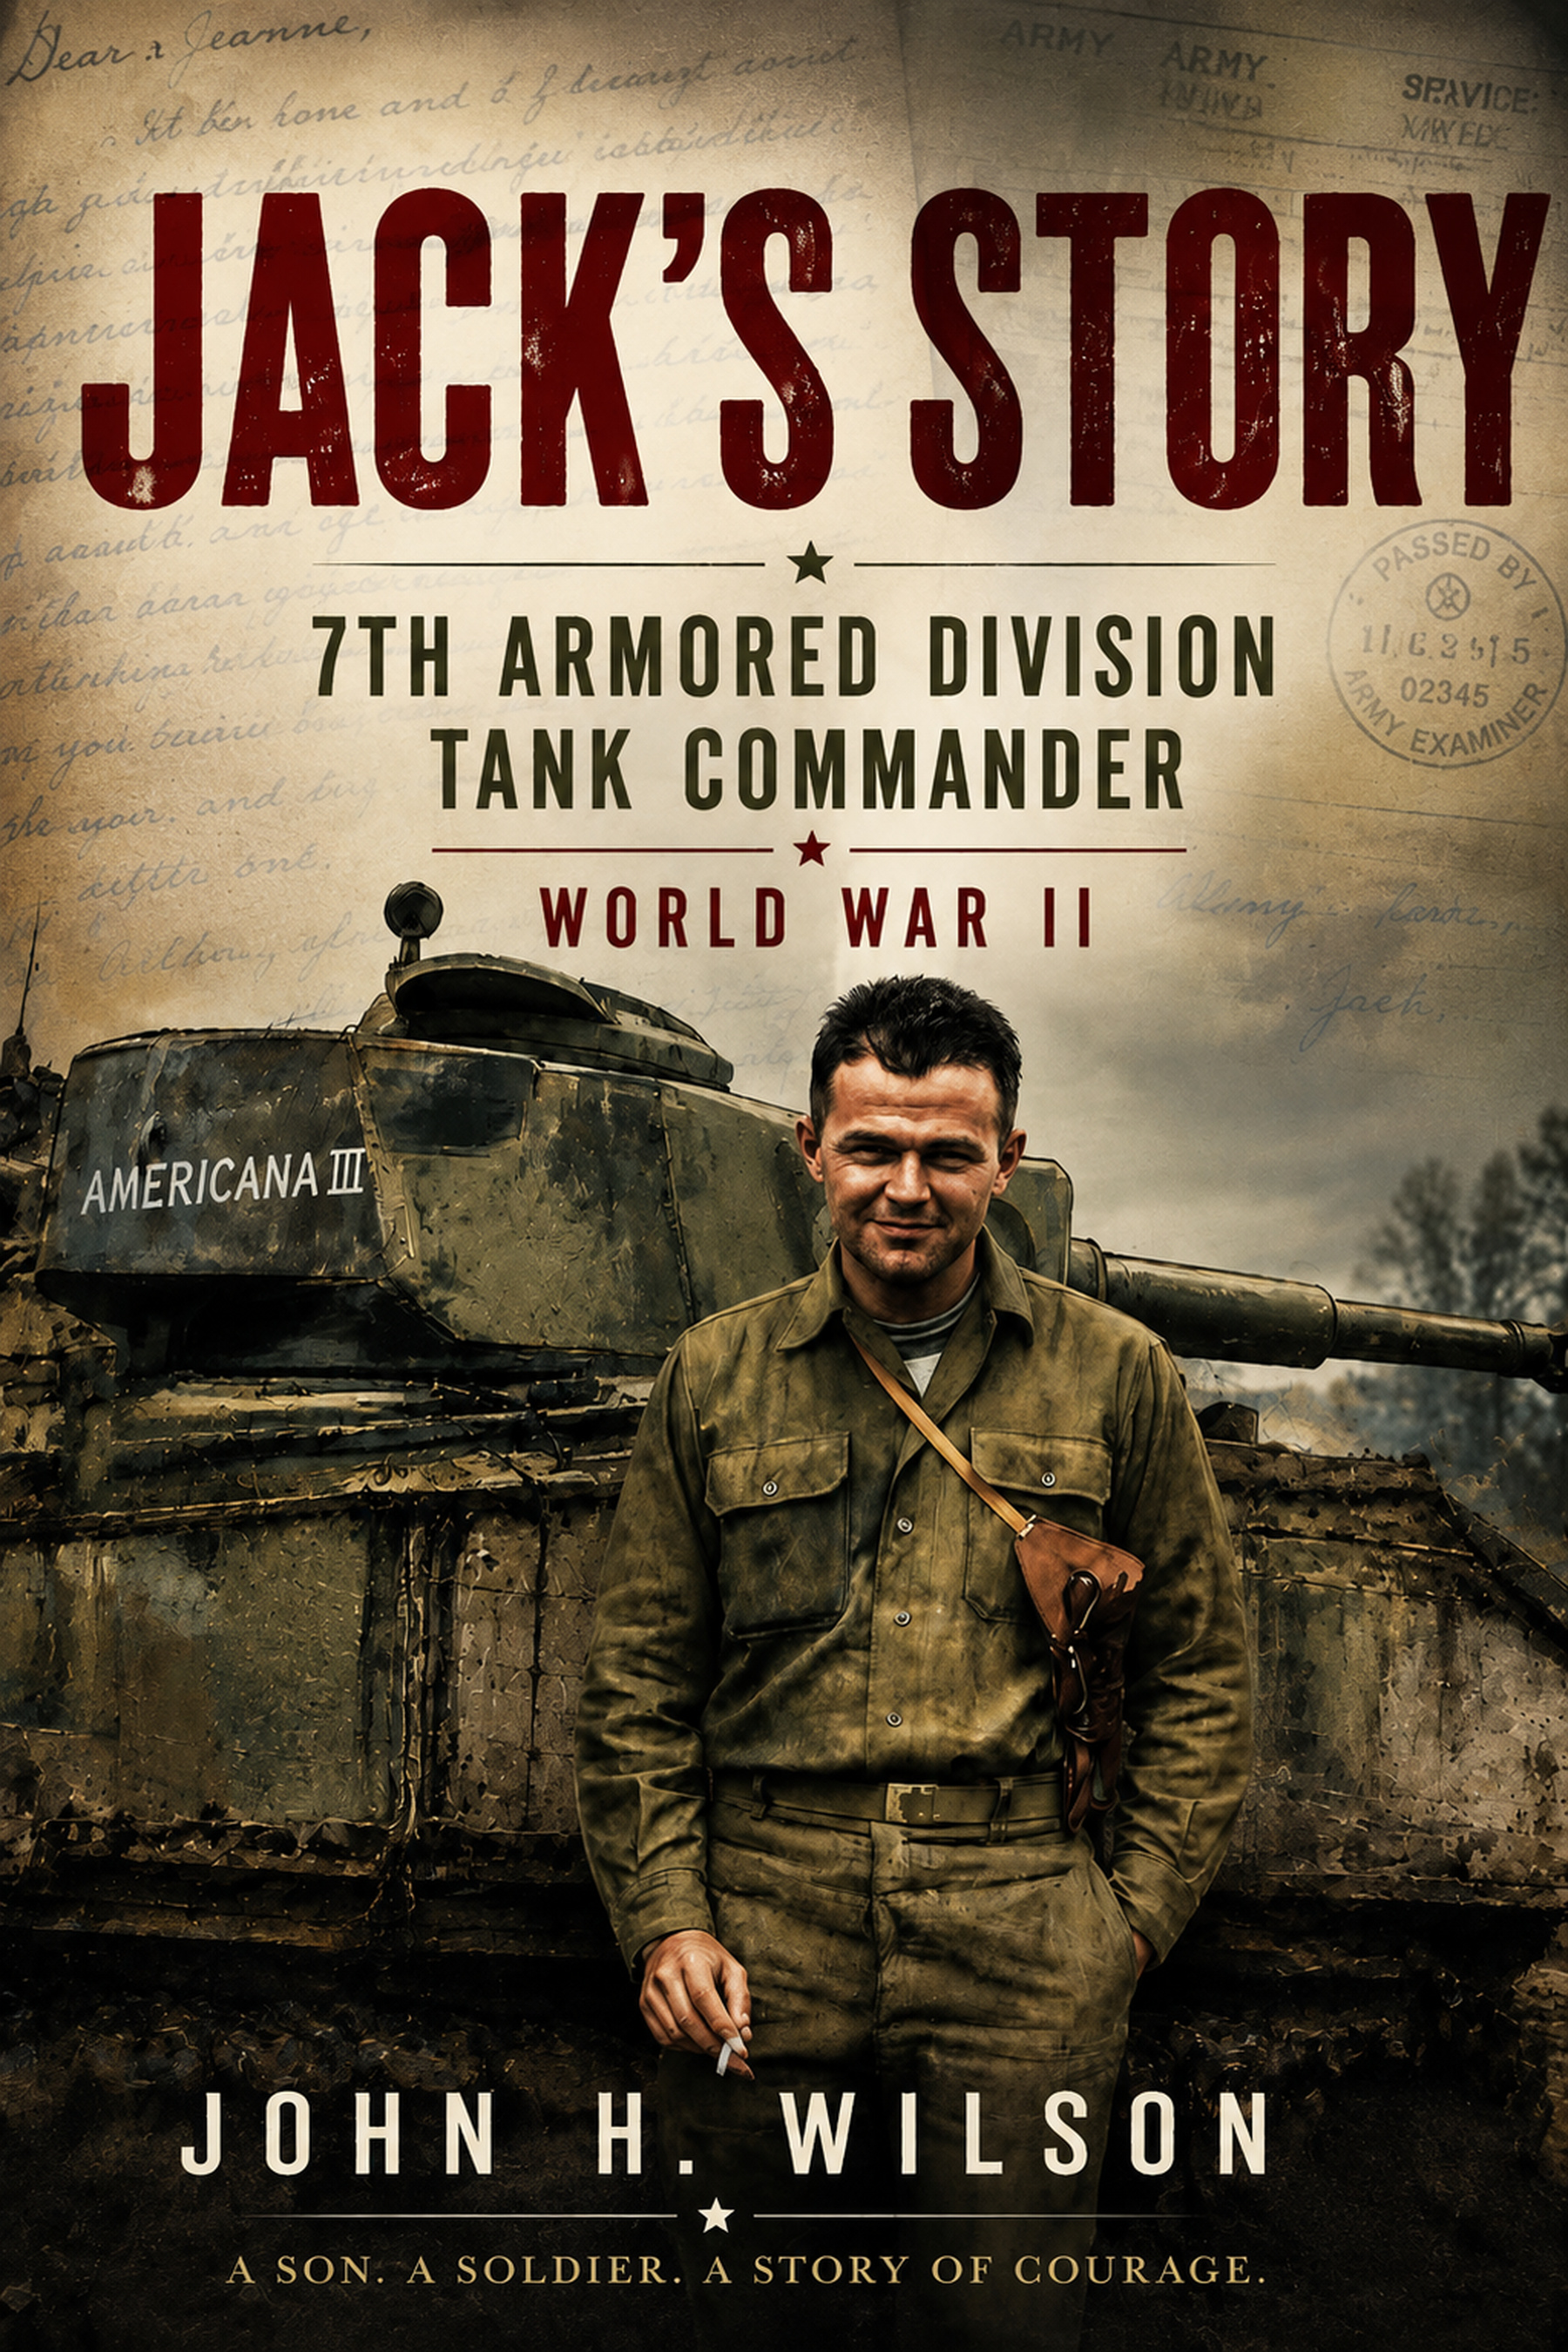
Cover of Jack's Story: the title in bold red over a faint handwritten wartime letter and a censor's “Passed by Army Examiner” stamp, with a young American tank commander in a field jacket standing before a tank marked “Americana III.”
Jack's Story — 7th Armored Division Tank Commander, World War II.
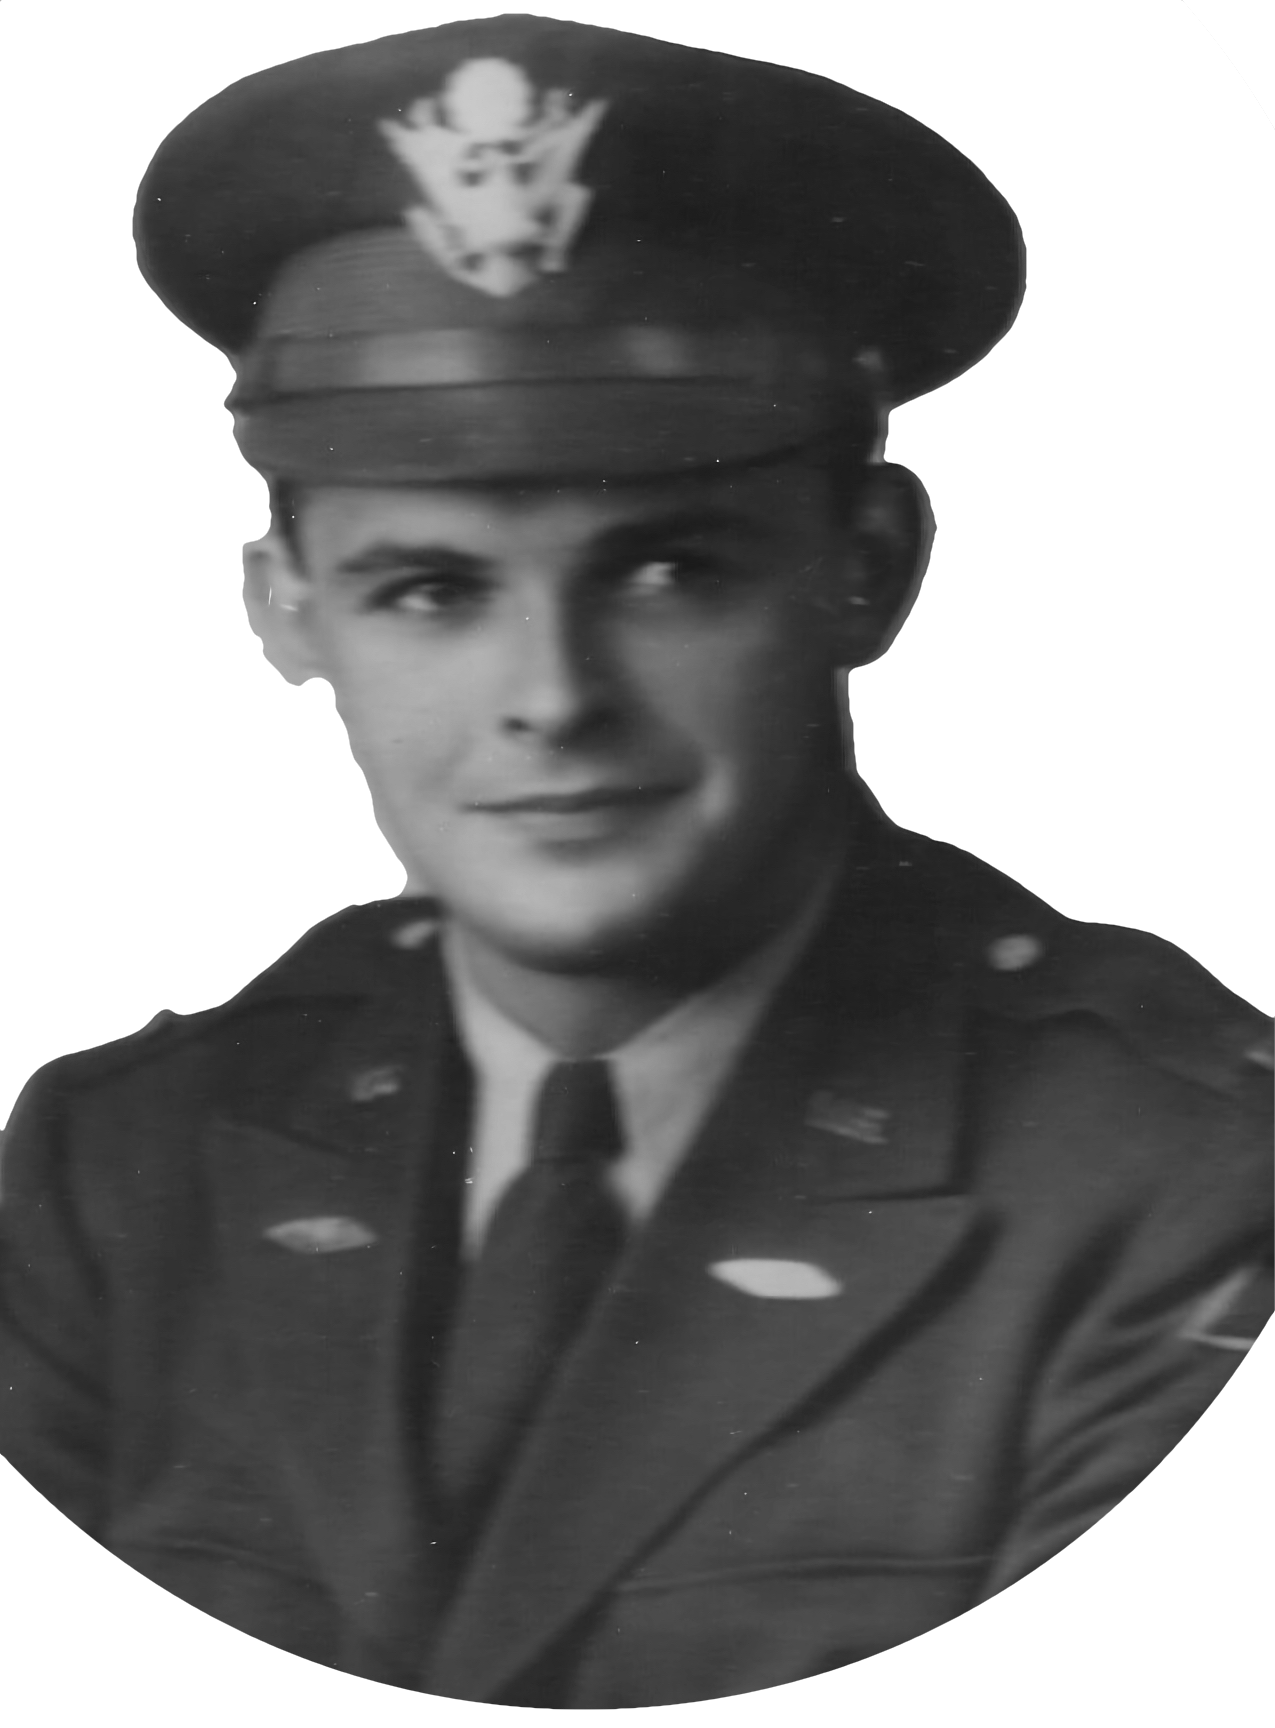
Portrait of Second Lieutenant John C. “Jack” Wilson Jr. in U.S. Army uniform and officer's service cap — the young tank commander whose story the book tells.
Second Lieutenant John C. “Jack” Wilson Jr.
Chapter 1

Let's Meet Jack Wilson

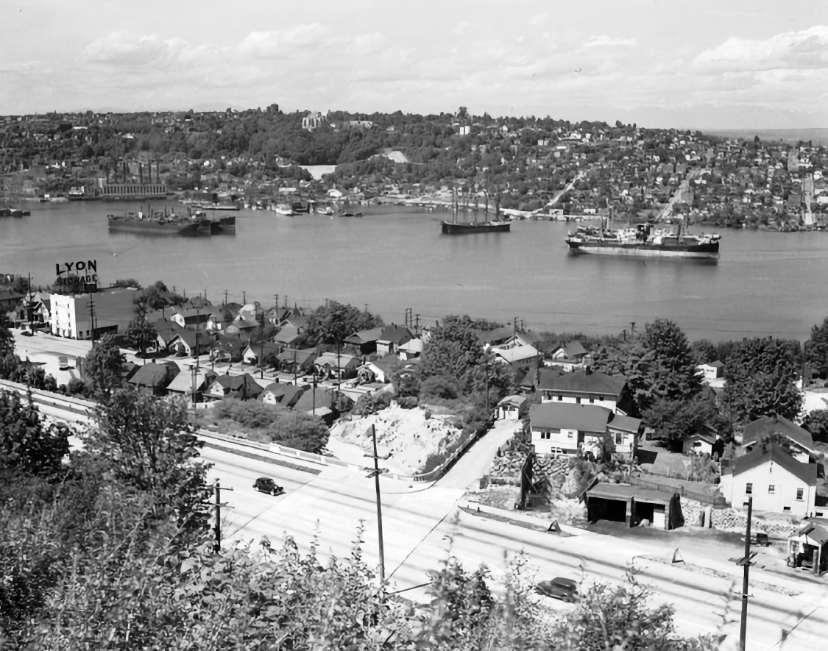
Black-and-white view from Queen Anne Hill across Lake Union toward Seattle, with houses, roads, docks, and ships along the waterfront — the neighborhood where Jack grew up.
Seattle from Queen Anne Hill in the 1930s, where Jack grew up overlooking Lake Union and the growing city.
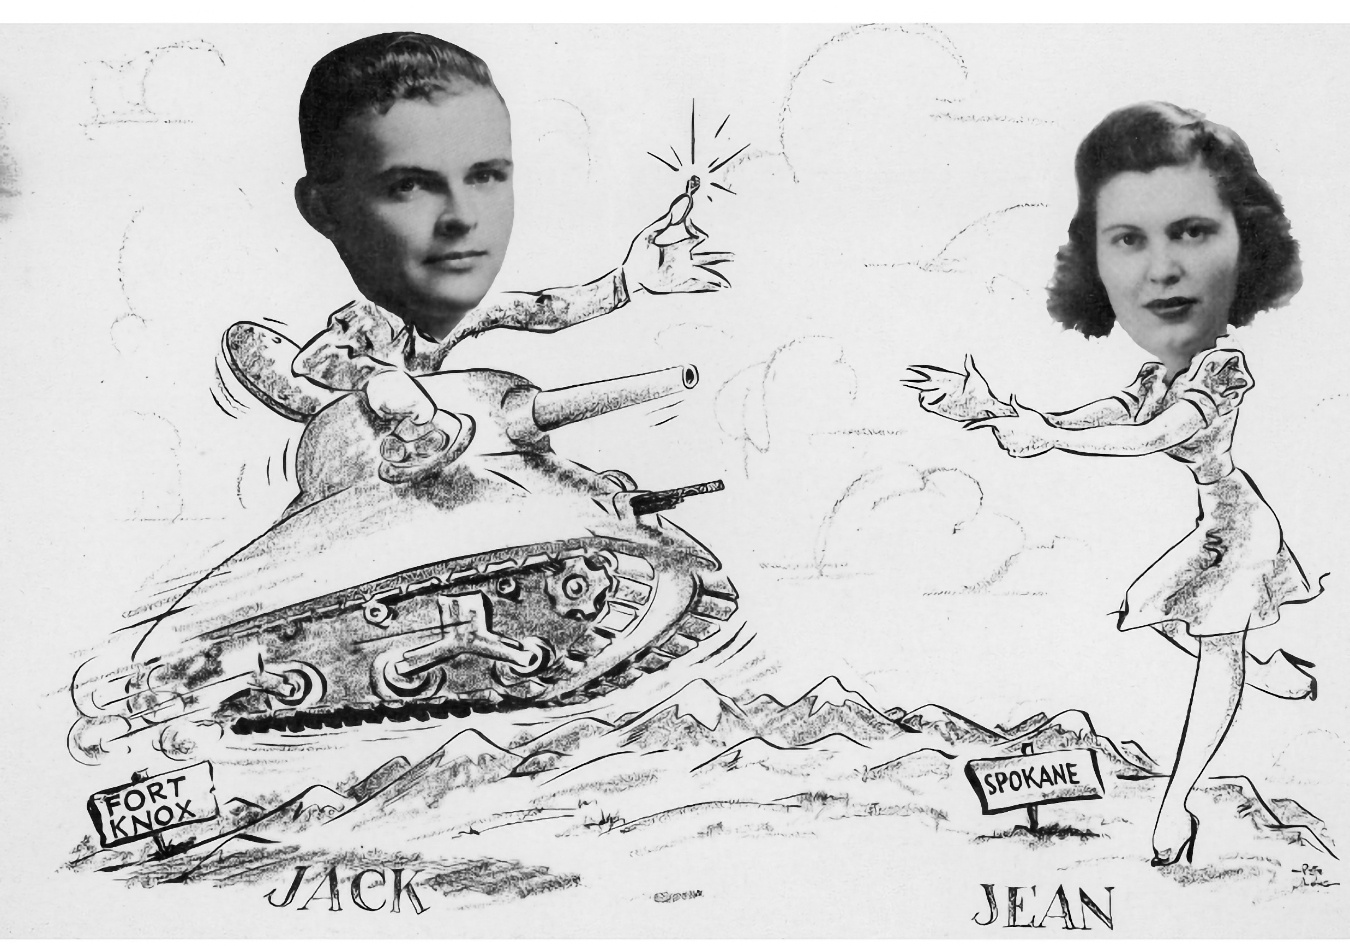
Caricature of Jack riding a tank near a Fort Knox sign and reaching toward Jean by a Spokane sign, their photographic portraits worked into the drawing — sent when he proposed in 1943.
“Apart but together.” Jack sent this caricature to Jean from Fort Knox when he proposed to her in the summer of 1943.
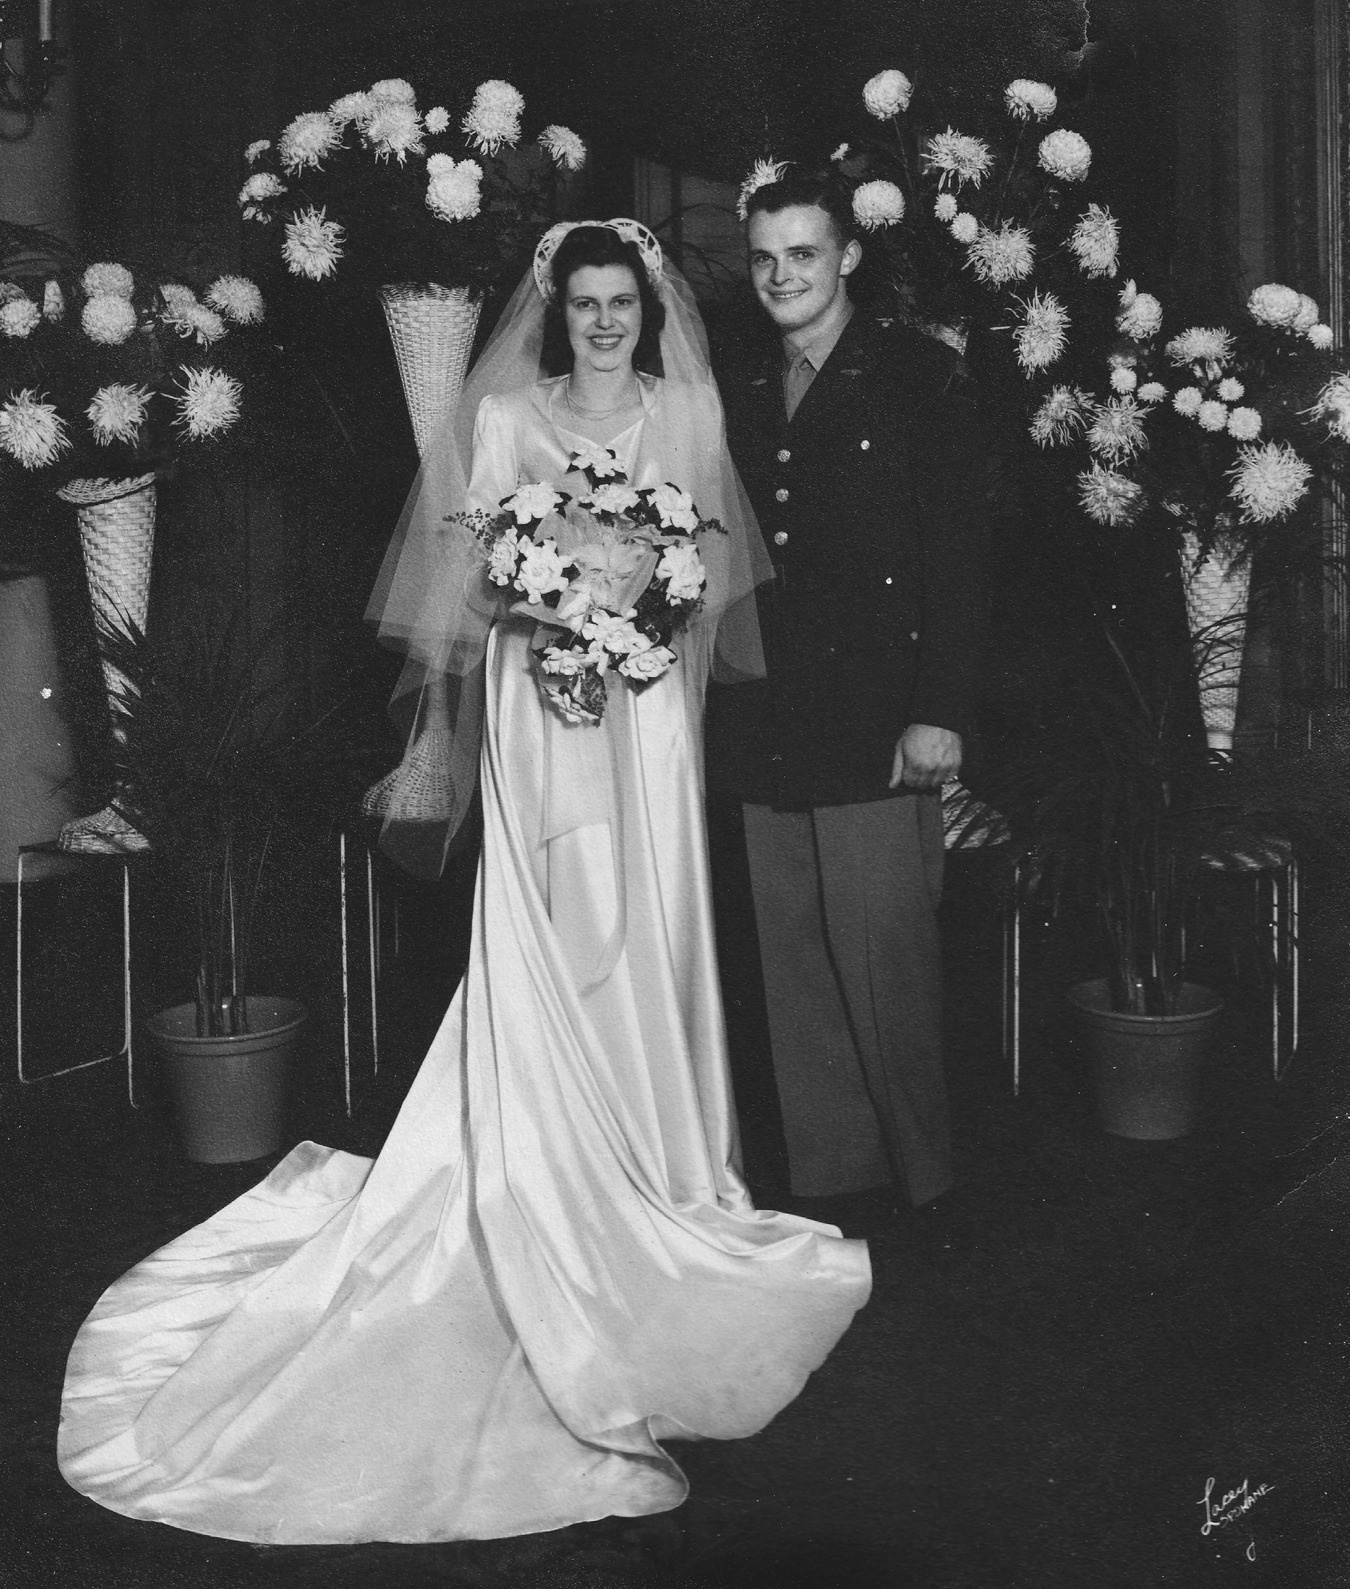
Black-and-white wedding portrait of Jack in uniform beside Jean in her gown and veil, surrounded by floral arrangements, on their wedding day in January 1944.
Jack and Jean on their wedding day, January 12, 1944, at St. John's Episcopal Cathedral in Spokane.
Chapter 2

Waiting for European Deployment

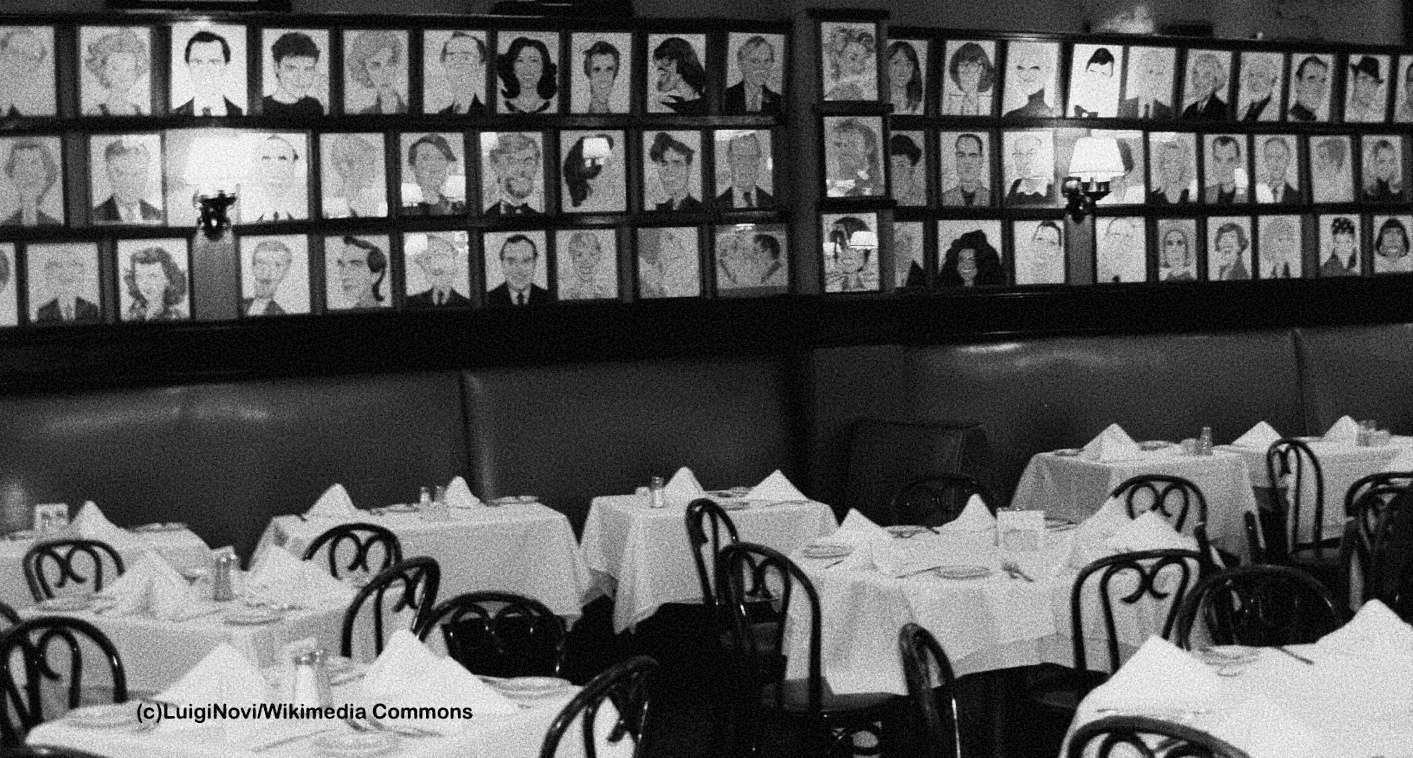
Black-and-white photograph of the dining room at Sardi's in New York City, its walls covered with rows of framed celebrity caricatures above the tables.
The famous caricature wall at Sardi's, where Jack, Jean, and Nell had dinner before seeing Oklahoma! on Broadway.
Chapter 3

Transfer to England

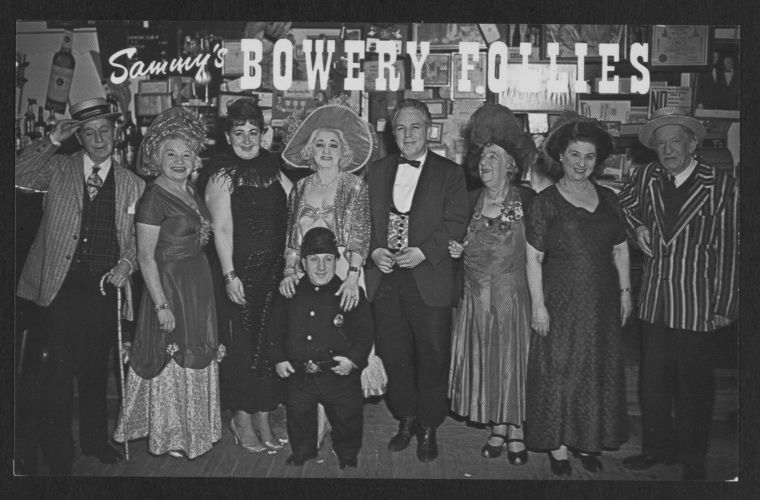
Black-and-white photograph of performers and staff at Sammy's Bowery Follies in New York City, posed beneath the club's large sign.
Sammy's Bowery Follies, a favorite New York nightspot for servicemen. Jack spent an evening here with three fellow lieutenants while awaiting shipment overseas.
Chapter 5

Joining the 7th Armored Division

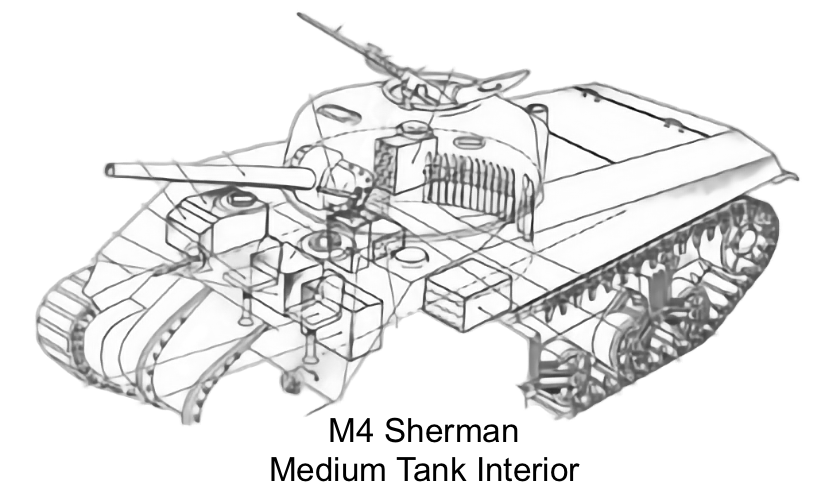
Cutaway drawing of an M4 Sherman medium tank showing the turret, crew positions, main gun, ammunition storage, and driving compartment.
Inside an M4 Sherman. Five men—commander, gunner, loader, driver, and assistant driver—worked together in the confined space of the tank.
Chapter 6

Jack's First Combat Experience

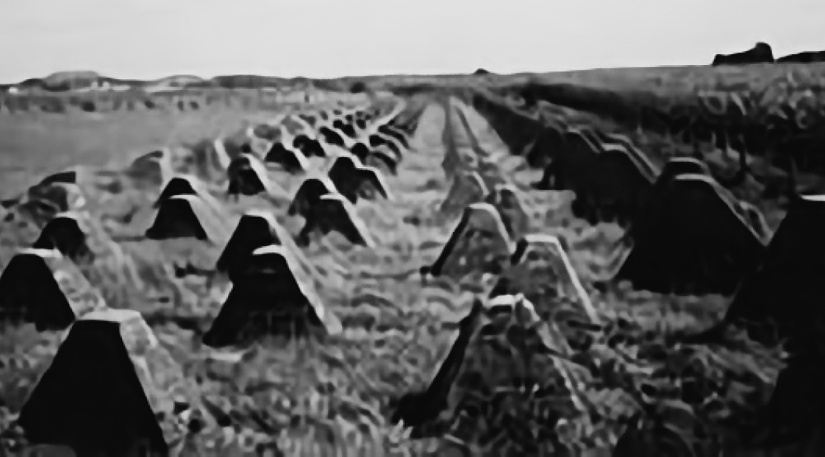
Black-and-white photograph of long rows of concrete pyramidal antitank obstacles, known as dragon's teeth, extending across open ground.
Rows of concrete “dragon's teeth,” antitank obstacles used by the Germans to block or channel advancing armor.
Chapter 7

What's Next?

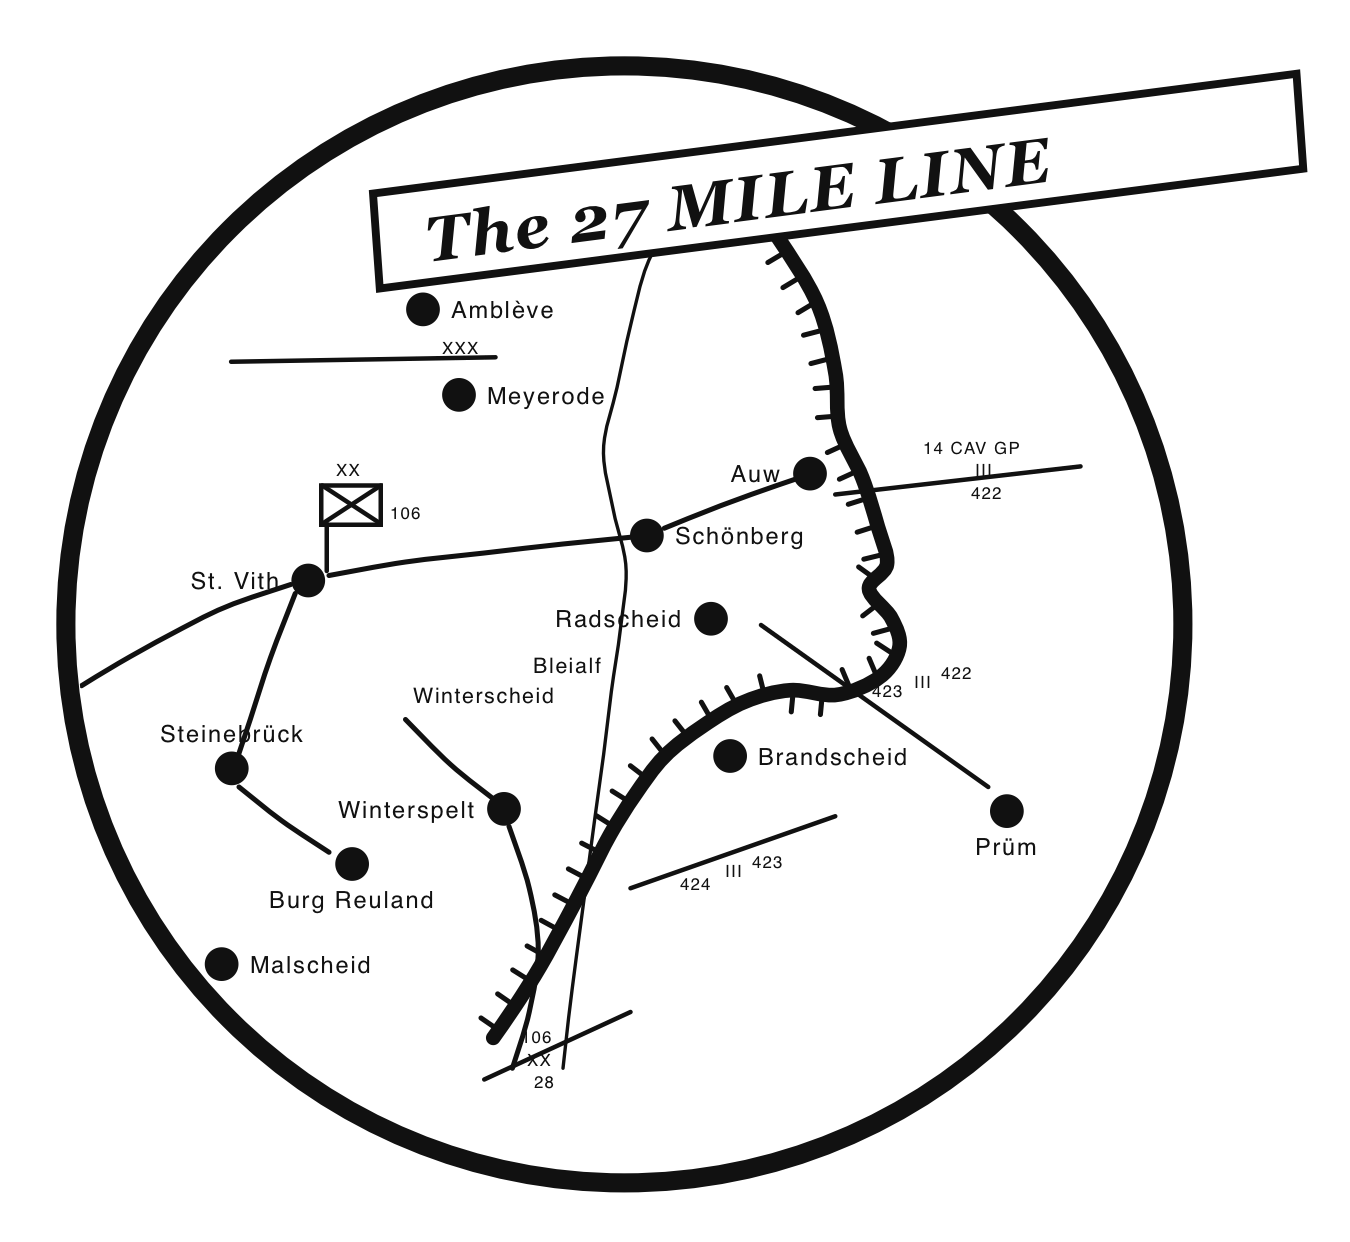
Map of the “27 Mile Line” defensive area around St. Vith, Belgium, showing the town of St. Vith and the surrounding villages along the American defensive front, with unit positions marked.
The “27 Mile Line” east of St. Vith, showing the extended American defensive positions and the towns along the front.
Chapter 8

German Attack

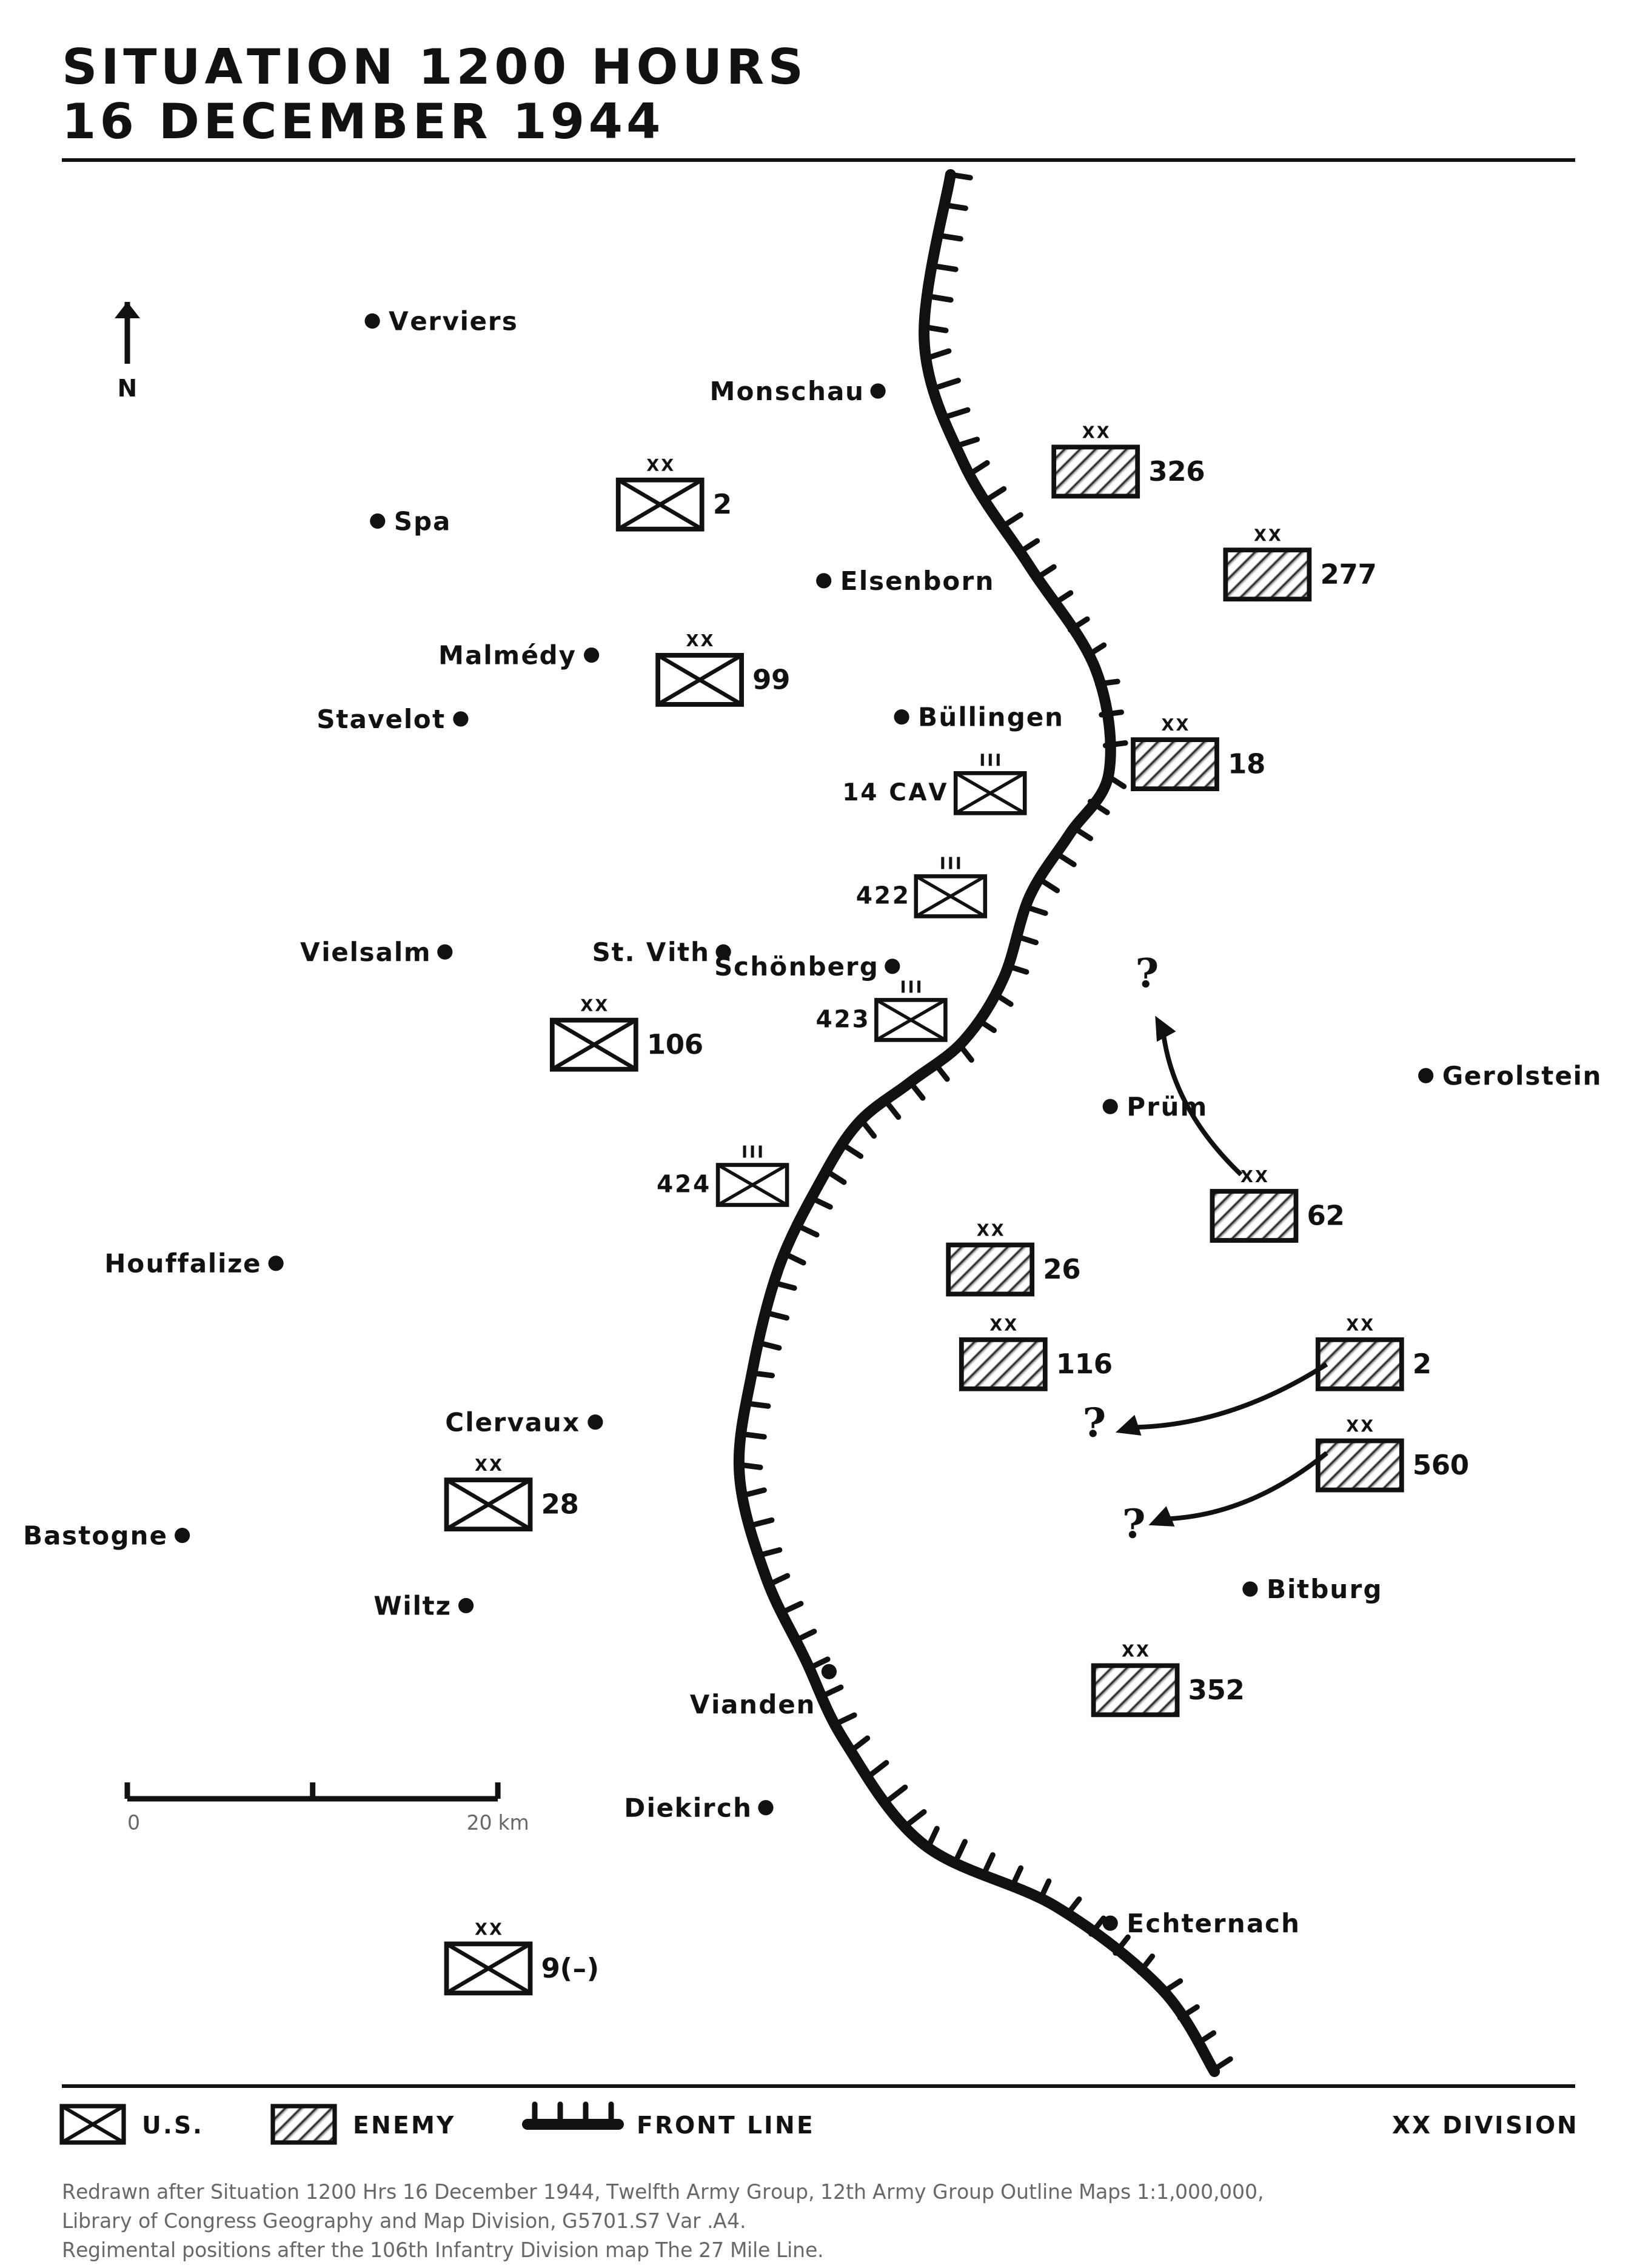
Military situation map for noon on December 16, 1944, showing American and German positions from Monschau south to Echternach, with St. Vith near the center and arrows marking developing German advances.
The German offensive at noon on December 16, 1944. American positions stretched along the front as German divisions began pushing west toward St. Vith and the surrounding road network.
Chapter 9

The Battle of the Bulge

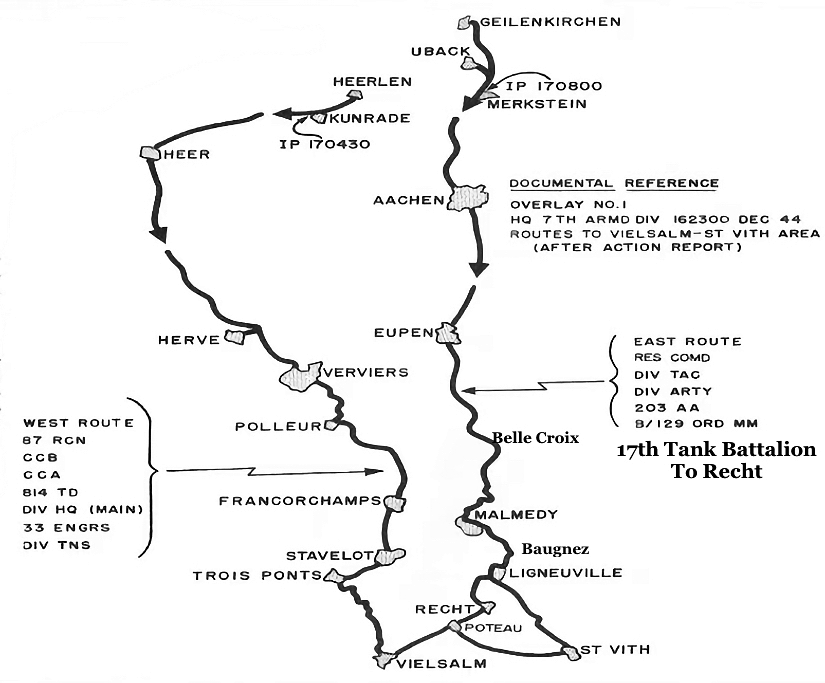
Map of the 7th Armored Division's two routes south to the St. Vith area in December 1944; the 17th Tank Battalion followed the eastern route through Aachen, Eupen, Malmedy, and Ligneuville to Recht.
The 7th Armored Division's two routes south to St. Vith, December 1944. Jack's 17th Tank Battalion took the eastern route through Malmedy and Ligneuville to Recht.
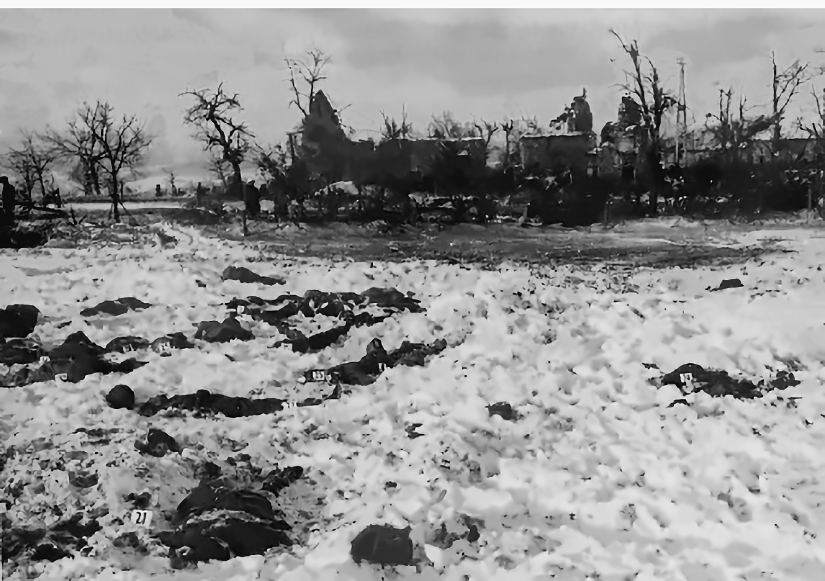
Snow-covered field near Malmedy after the massacre, with the bodies of American soldiers in the snow and damaged buildings behind.
The field near Malmedy after the massacre, where captured American soldiers were killed during the German offensive.
Chapter 10

Defending St. Vith

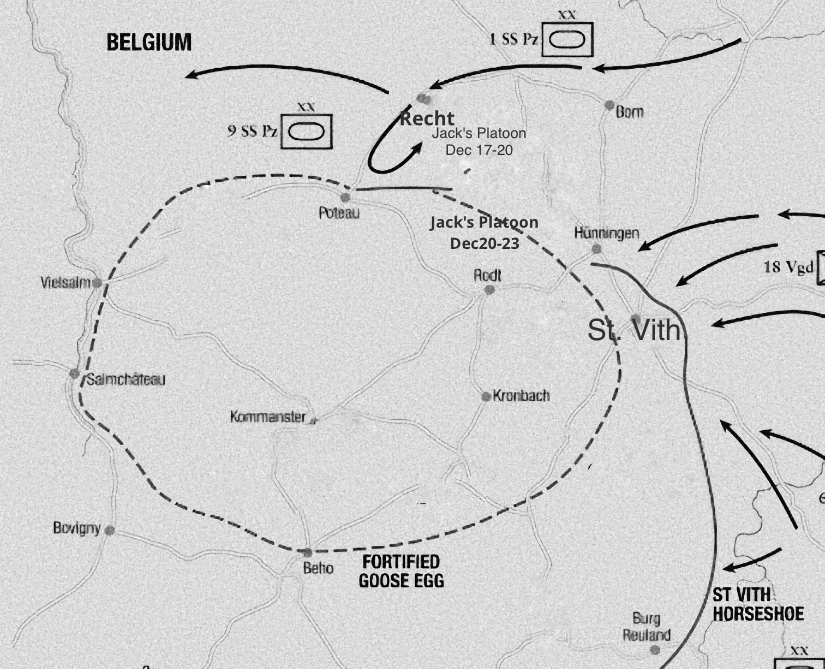
Map of the St. Vith defensive perimeter, the “Goose Egg,” showing German advances around the American positions, with Jack's platoon marked at Recht (Dec 17–20) and near Rodt (Dec 20–23).
The St. Vith “Goose Egg.” German forces were pushed south and west around the American defensive perimeter. Jack's platoon fought at Recht from December 17–20 and above Rodt from December 20–23.
Chapter 11

The Führer Escort Brigade Takes St. Vith

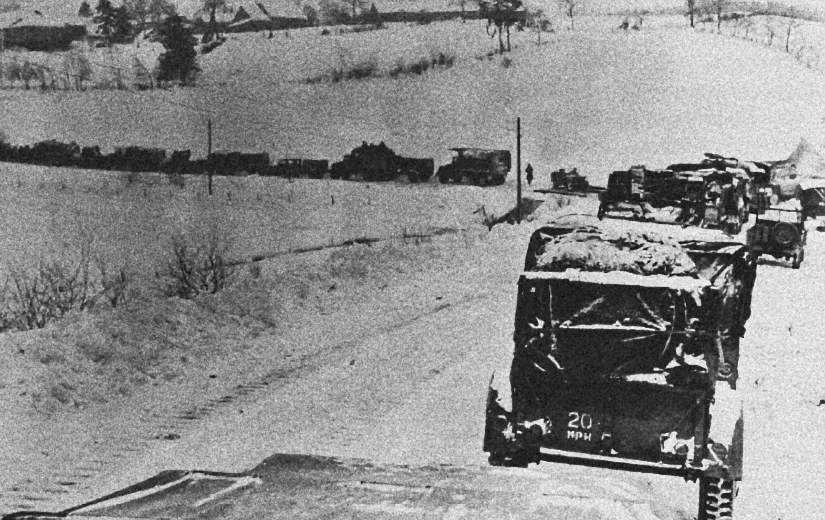
Black-and-white photograph of American military vehicles backed up along a narrow, snow-covered road near St. Vith, more vehicles visible across the countryside.
American vehicles crowd a snow-covered road in the St. Vith area during the Battle of the Bulge. The congestion on the narrow winter roads complicated the movement of men, armor, and supplies.
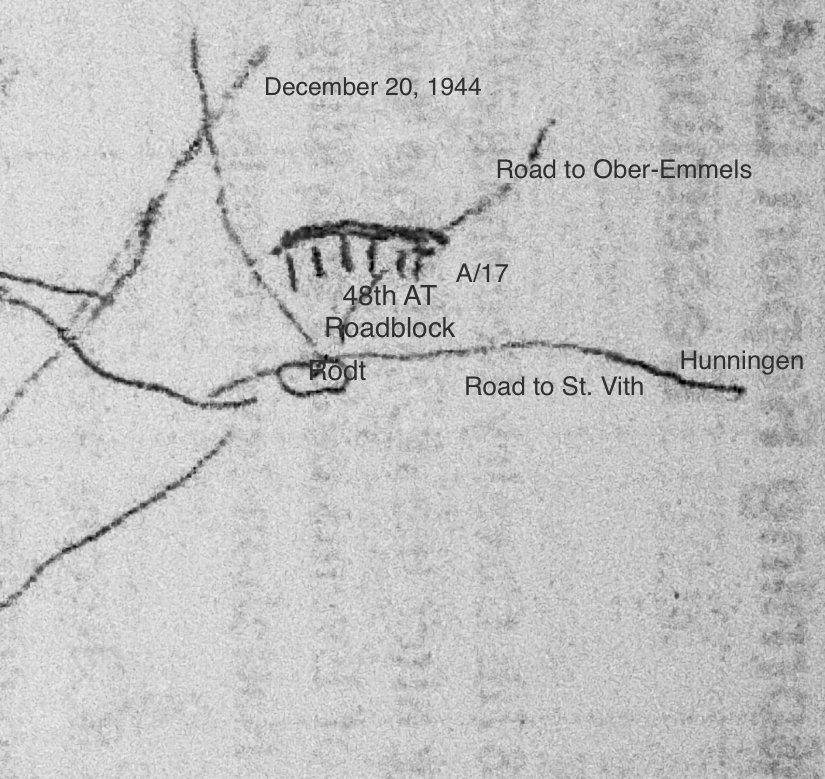
Hand-drawn tactical map dated December 20, 1944, showing the A/17 and 48th AT roadblock near Rodt and roads toward Hünningen, St. Vith, and Ober-Emmels.
Task Force Stine positions near Rodt, December 20, 1944. The map shows the A/17 and 48th AT roadblock controlling the approaches toward Hünningen, St. Vith, and Ober-Emmels.
Chapter 12

"Fight Your Way Out"

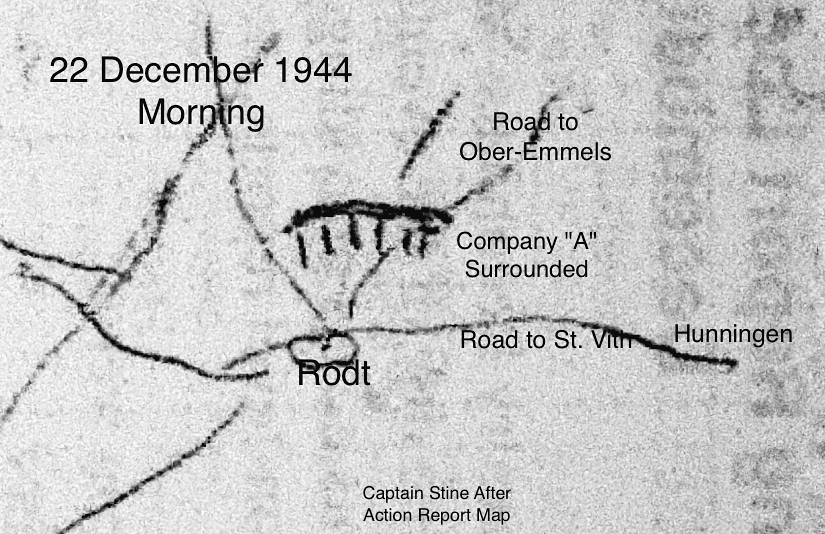
Tactical map dated December 22, 1944, showing Company A surrounded northeast of Rodt, between the roads to Ober-Emmels and St. Vith near Hünningen.
Company A surrounded northeast of Rodt, morning of December 22, 1944. With St. Vith and Rodt in German hands, Jack's unit found itself behind the German lines with its route west threatened.
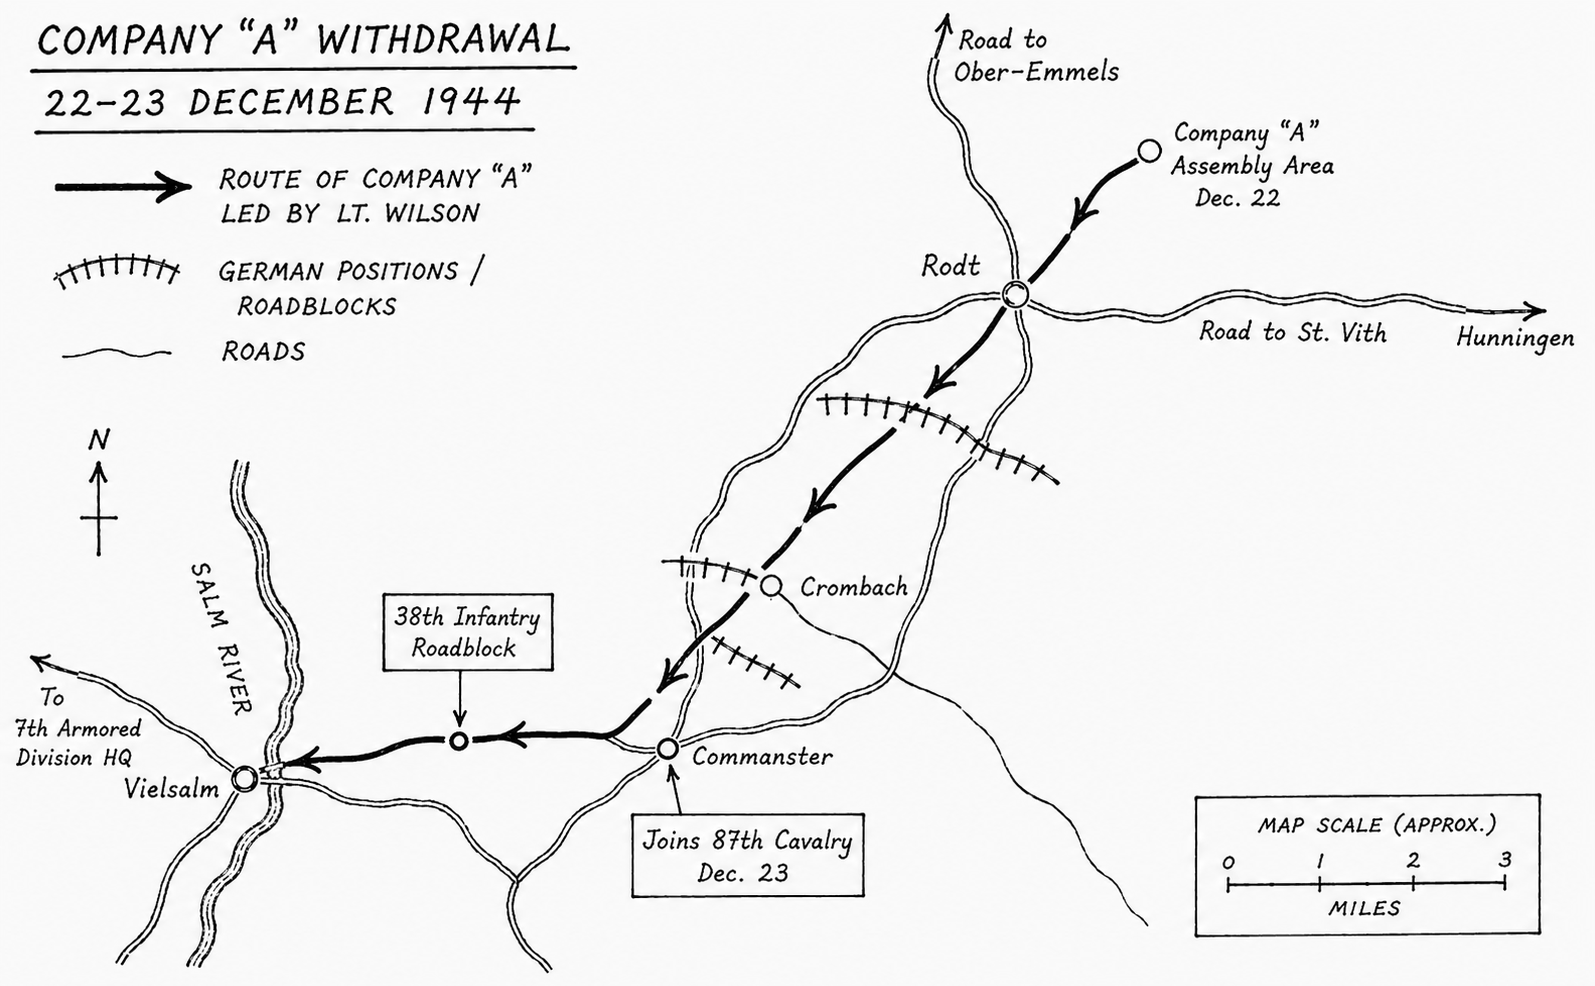
Map of the St. Vith–Rodt–Vielsalm area showing German advances from St. Vith, Task Force Stine positions near Rodt, and Company A's withdrawal route west through Commanster toward Vielsalm.
Company A's withdrawal from behind the German lines, December 22, 1944. From its position northeast of Rodt, the force fought its way west toward the new defensive line and the 7th Armored Division headquarters at Vielsalm.
Chapter 13

The Retaking of St. Vith

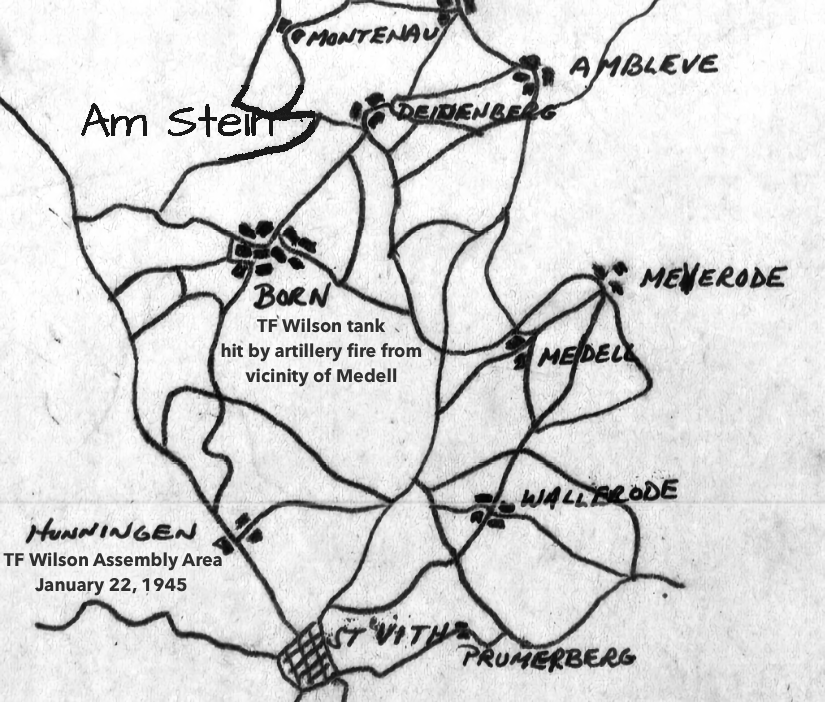
Hand-drawn map of the area north of St. Vith showing Am Stein, Born, Deidenberg, Hunningen, and surrounding roads, with labels marking Task Force Wilson's January 22 assembly area at Hunningen and where a tank was hit by artillery near Born.
Map of the fighting north of St. Vith, showing Am Stein, Born, Deidenberg, Hunningen, and the surrounding villages during Task Force Wilson's final operations in the Battle of the Bulge.
Chapter 14

Recovery and Return to Service

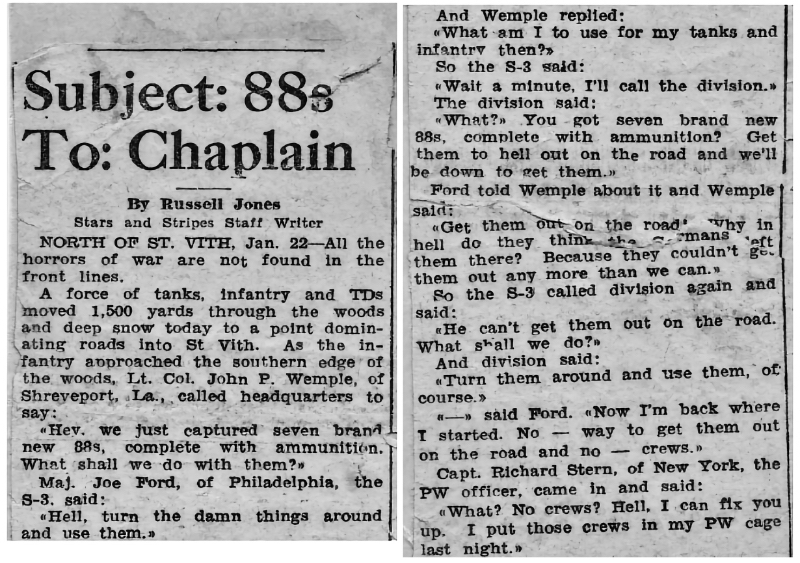
Newspaper clipping from Stars and Stripes headlined “Subject: 88s — To: Chaplain,” reporting how a force of American tanks and infantry captured seven brand-new German 88mm guns north of St. Vith, with a wry exchange about what to do with the captured guns.
Stars and Stripes told the story of Company A's capture of seven German 88mm guns north of St. Vith. Jack enclosed the clipping in his January 25 letter to Jean, noting that “the circumstances differ slightly from the story.”
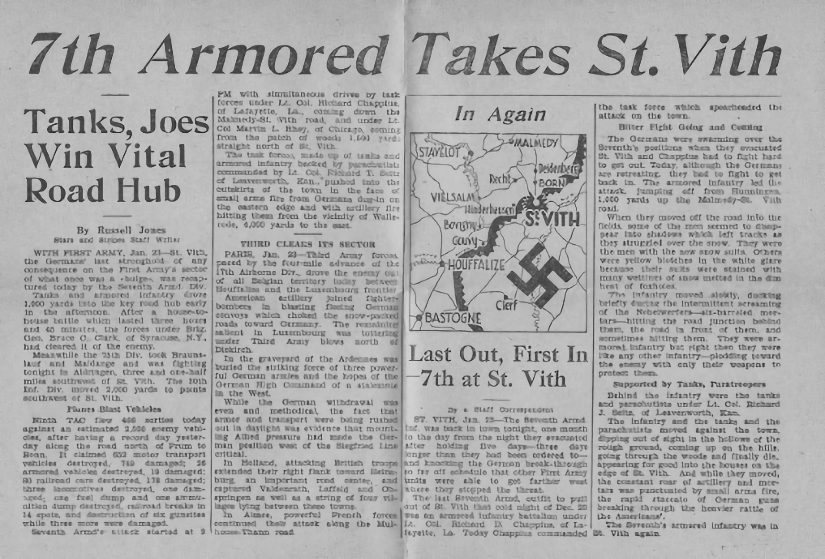
Newspaper page headlined “7th Armored Takes St. Vith — Tanks, Joes Win Vital Road Hub,” with a small map of the St. Vith area marking Malmédy, Vielsalm, and Bastogne, and a boxed feature titled “Last Out, First In — 7th at St. Vith.”
The division celebrated its return to St. Vith after retaking the city in January 1945. Contemporary newspaper coverage proclaimed the 7th Armored Division “Last Out, First In 7th at St. Vith.”
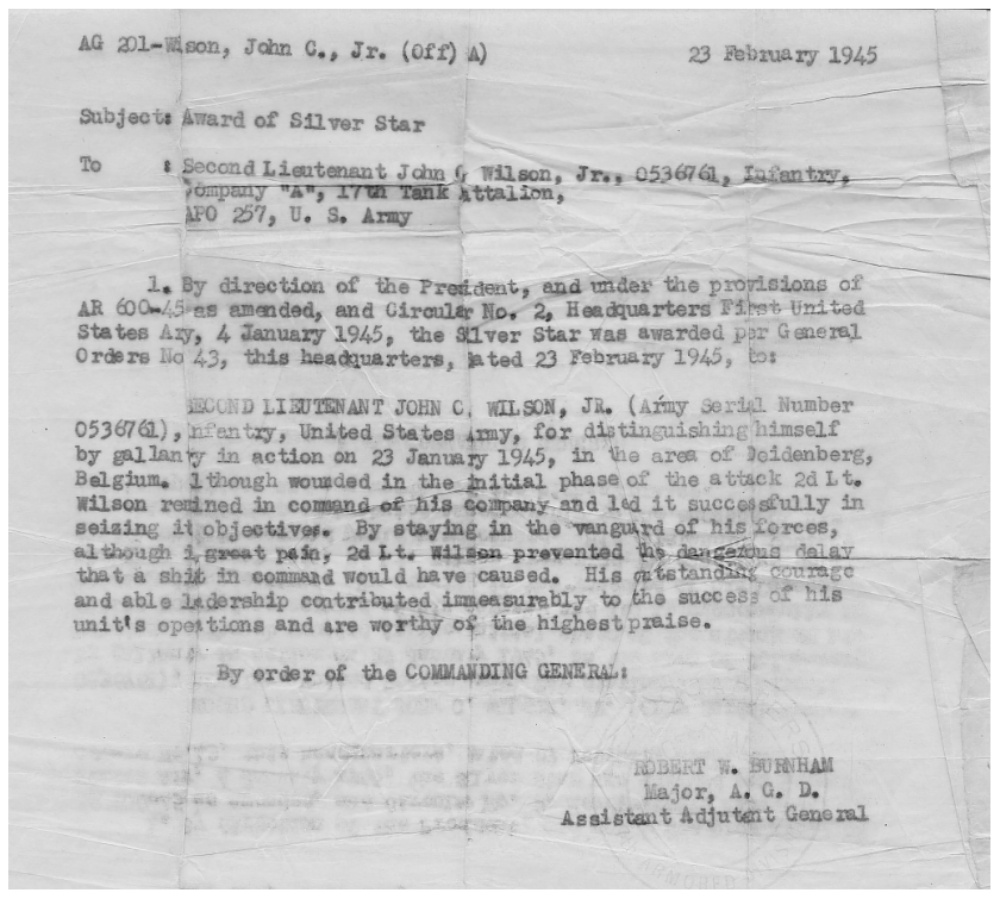
Official U.S. Army Silver Star award document dated February 23, 1945, for Second Lieutenant John C. Wilson Jr., citing his gallantry on January 23 near Deidenberg, Belgium — wounded, he remained in command and led his company to its objectives.
Jack's Silver Star award, dated February 23, 1945, recognizing his gallantry in action near Deidenberg, Belgium.
Chapter 15

Crossing the Rhine River

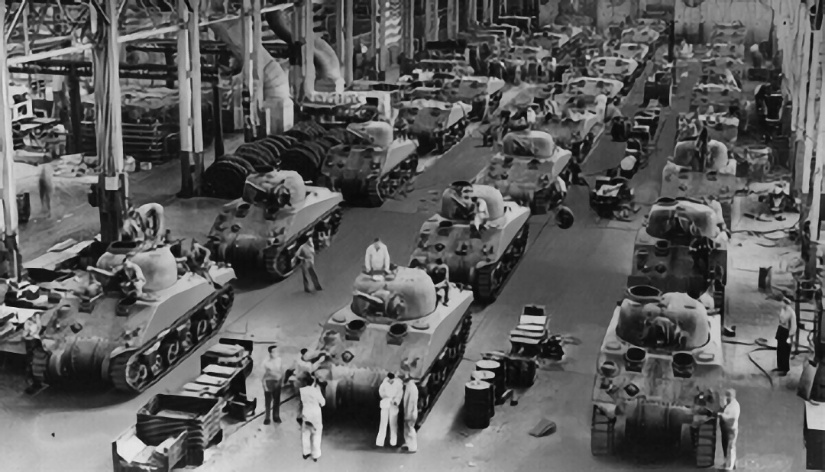
Black-and-white photograph of a wartime factory assembly line filled with rows of Sherman tanks in various stages of production, workers on and around the vehicles.
American Sherman tanks on a wartime production line. From Europe, Jack worried that strikes and production delays at home were keeping badly needed tanks, equipment, and replacement parts from the men at the front.
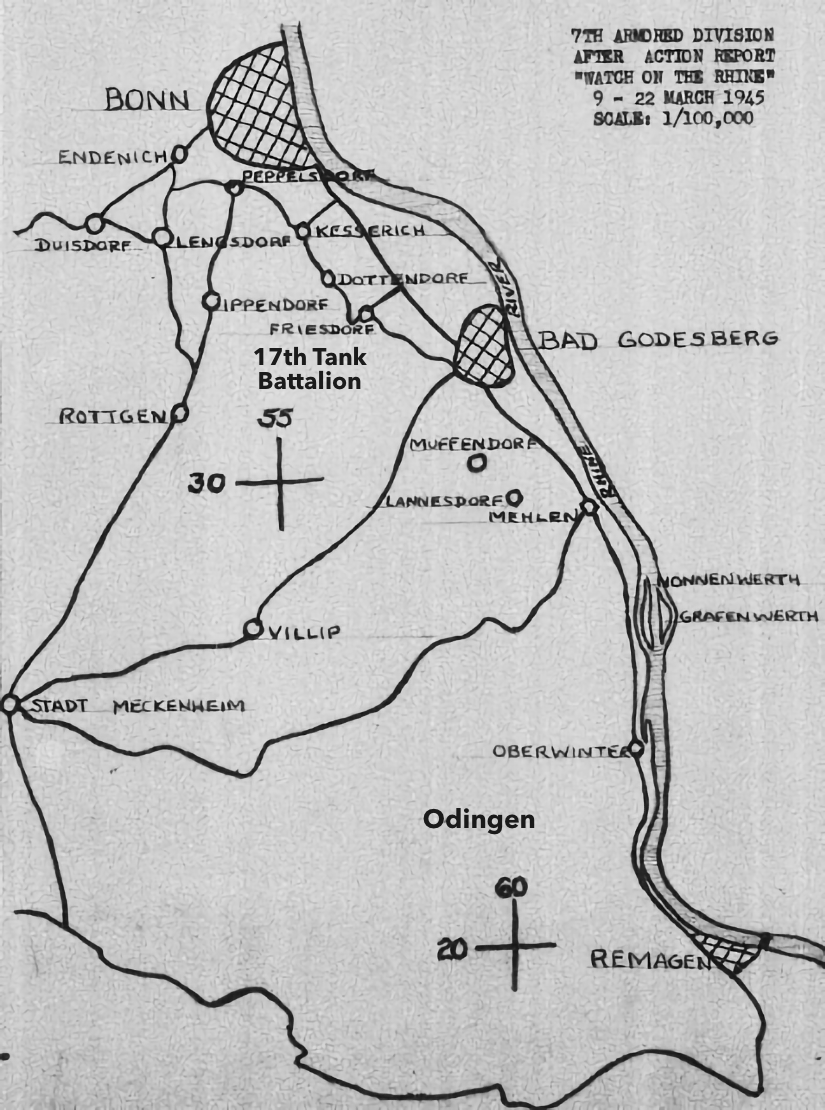
After-action map of the Rhine west bank from Bonn south to Remagen, with towns and roads including Meckenheim, Bad Godesberg, and Remagen; labels mark the 17th Tank Battalion area southwest of Bonn.
7th Armored Division after-action map of the area west of the Rhine between Bonn and Remagen. The 17th Tank Battalion operated southwest of Bonn as the division helped clear German resistance before crossing the Rhine.
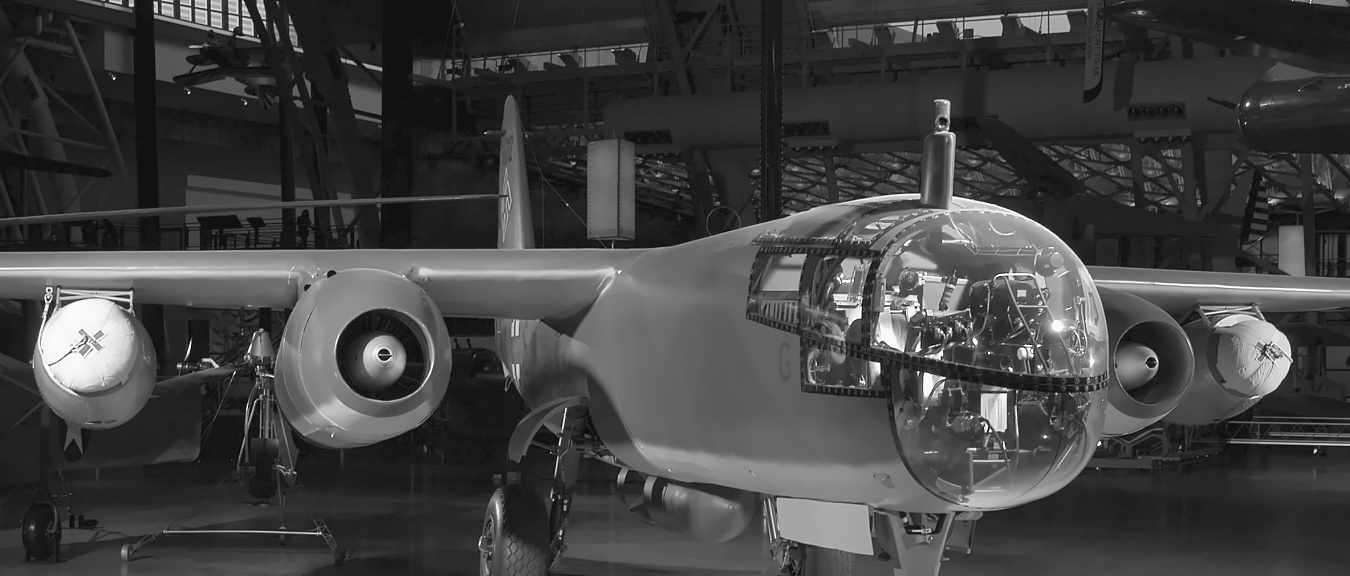
Black-and-white photograph of an Arado Ar 234 twin-engine jet bomber displayed indoors, viewed from the front, showing its long wings, two jet engines, and glazed cockpit nose.
Arado Ar 234, the world's first operational jet bomber. German Ar 234s were among the aircraft sent against the Allied bridges at Remagen in an effort to destroy the Rhine crossings.
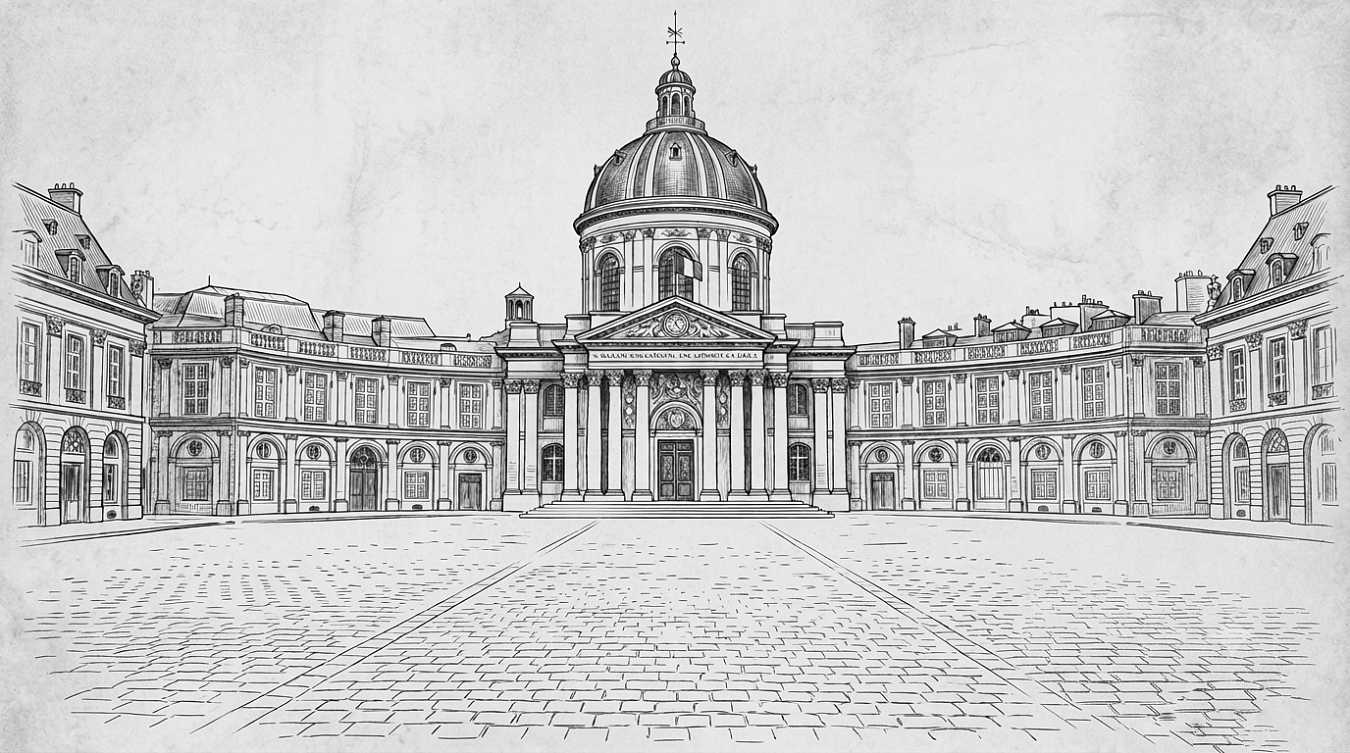
Black-and-white architectural illustration of the University of Paris: a symmetrical courtyard and classical academic buildings around a large domed central structure.
The University of Paris, where Jack attended Information and Education classes in March 1945 before returning to the 17th Tank Battalion.
Chapter 17

7th Armored at the Rim of the Ruhr

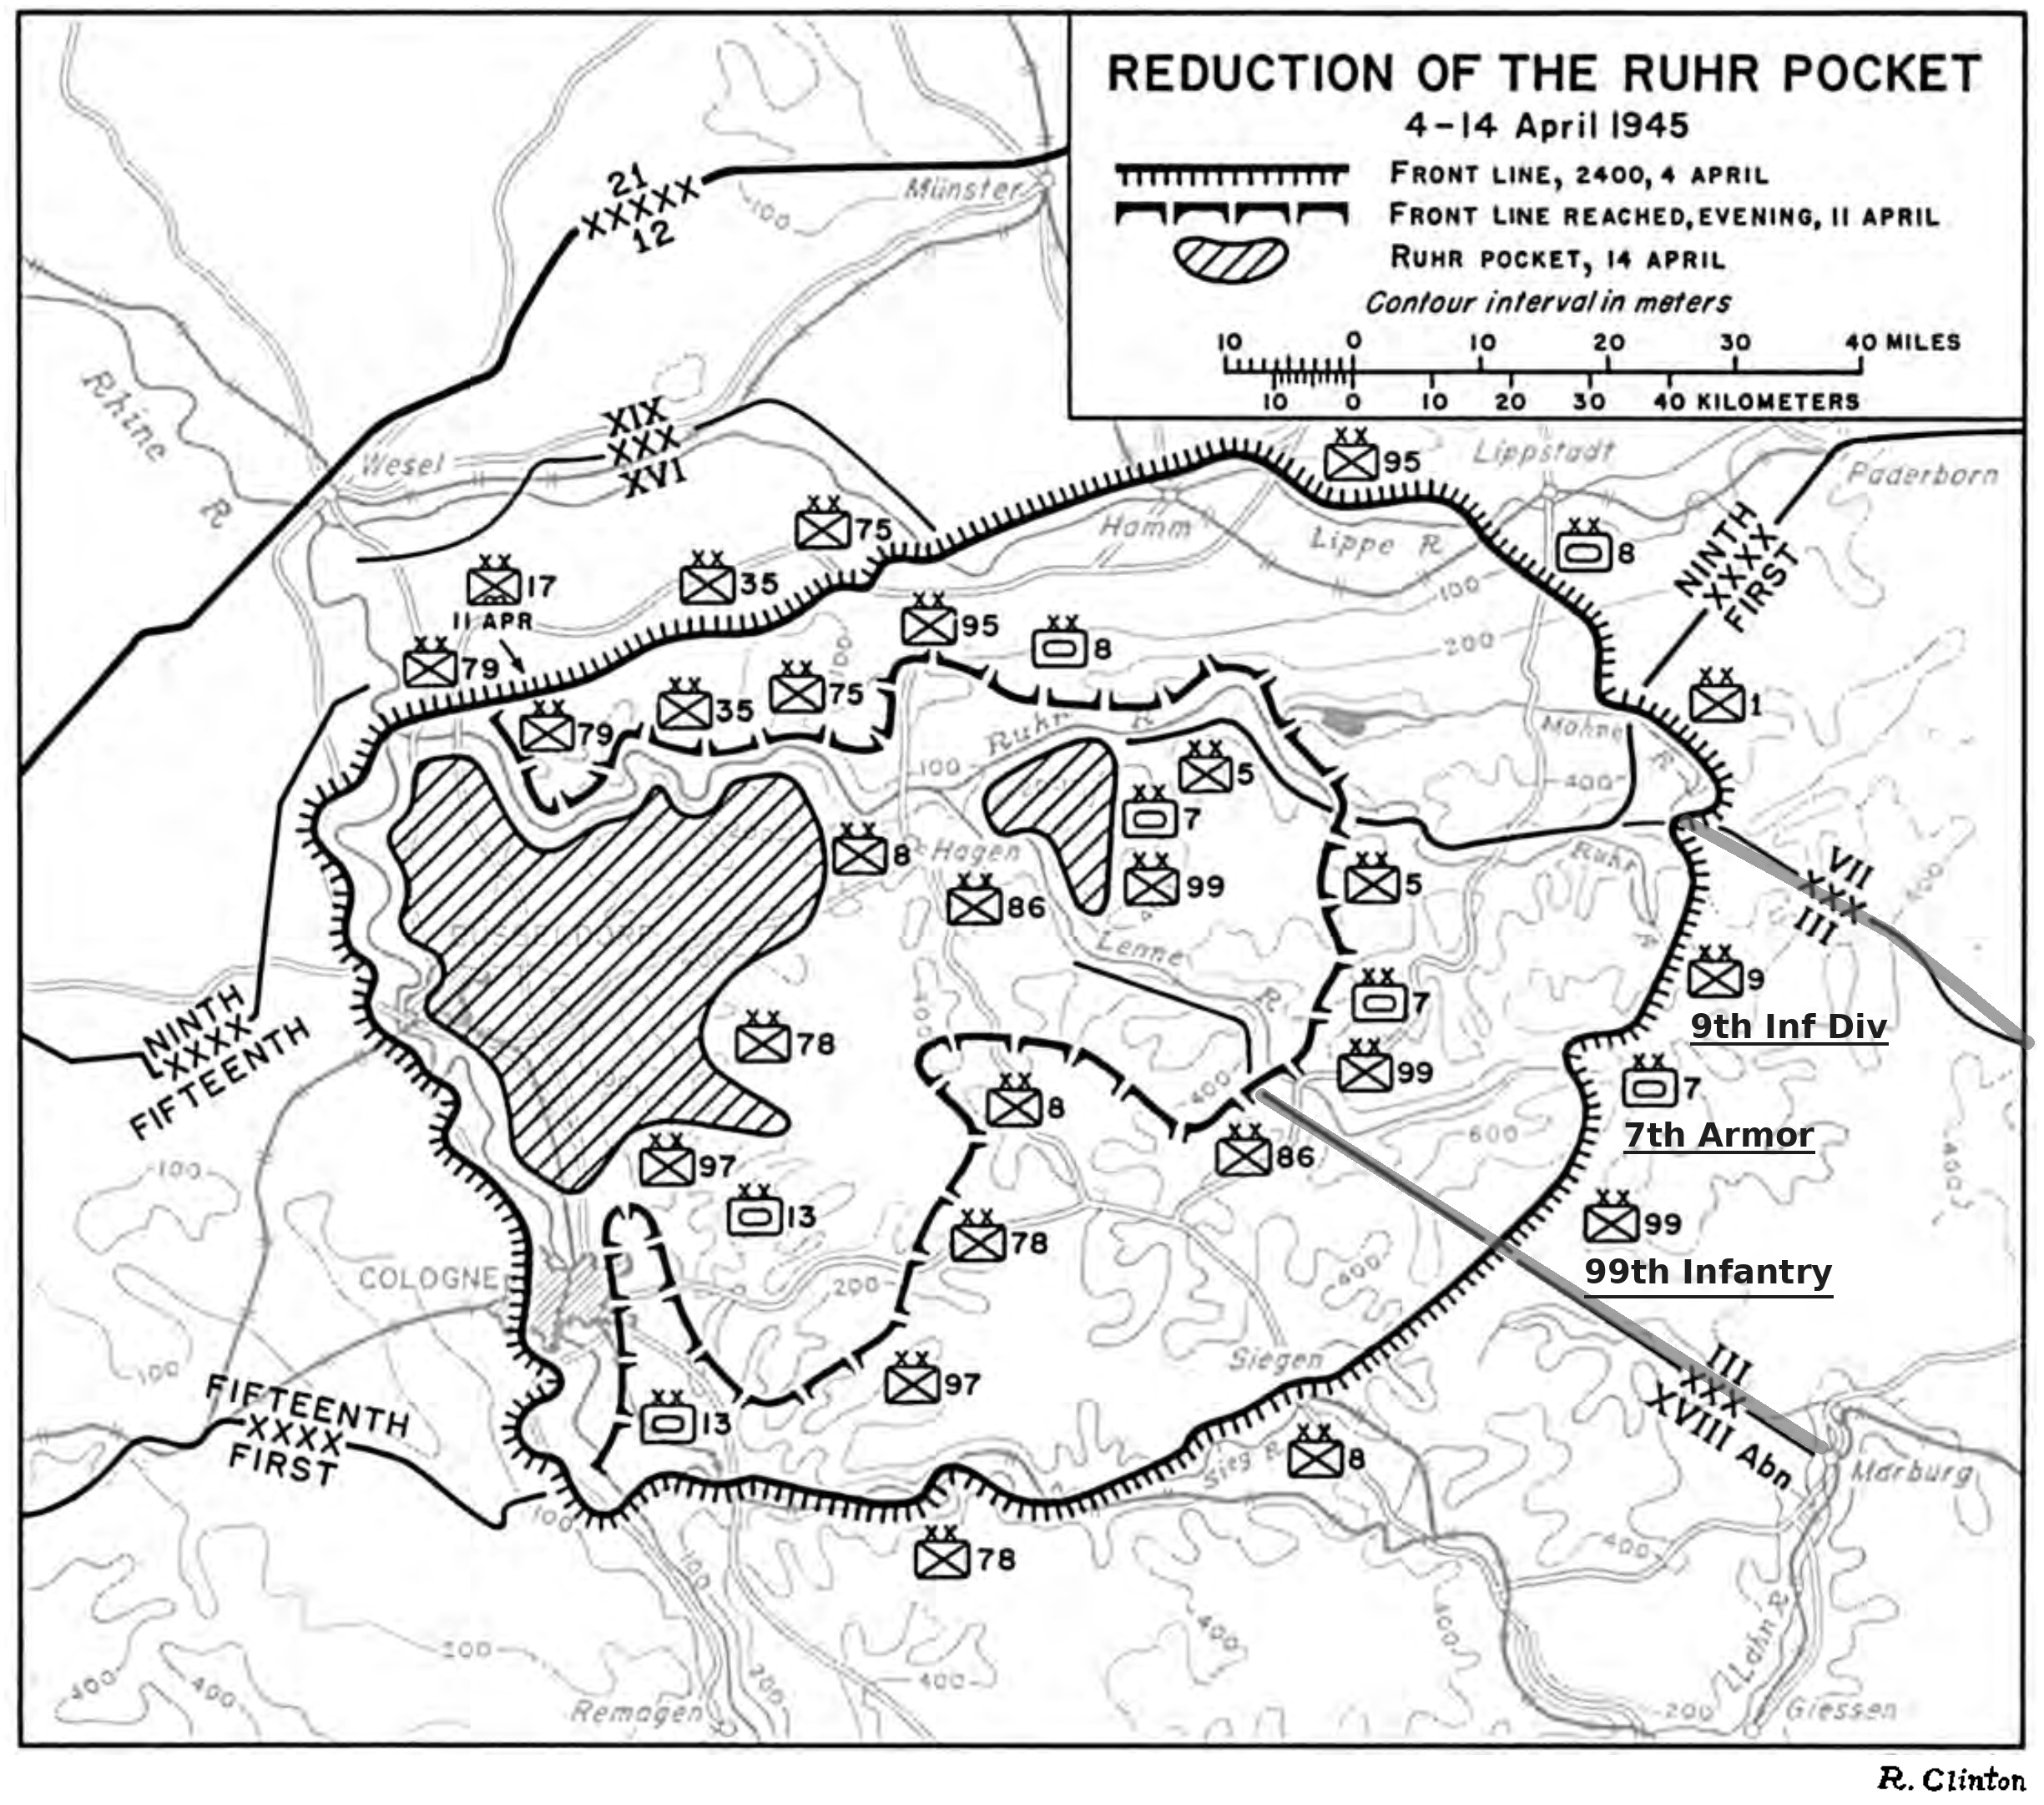
U.S. Army map of the Ruhr Pocket, April 4–14, 1945, showing the German-held pocket and surrounding American forces; added labels mark the 7th Armored Division in the center of III Corps, between the 9th and 99th Infantry Divisions.
Reduction of the Ruhr Pocket, April 4–14, 1945. The 7th Armored Division advanced into the Pocket in the center of III Corps, with the 9th Infantry Division on its right and the 99th Infantry Division on its left.
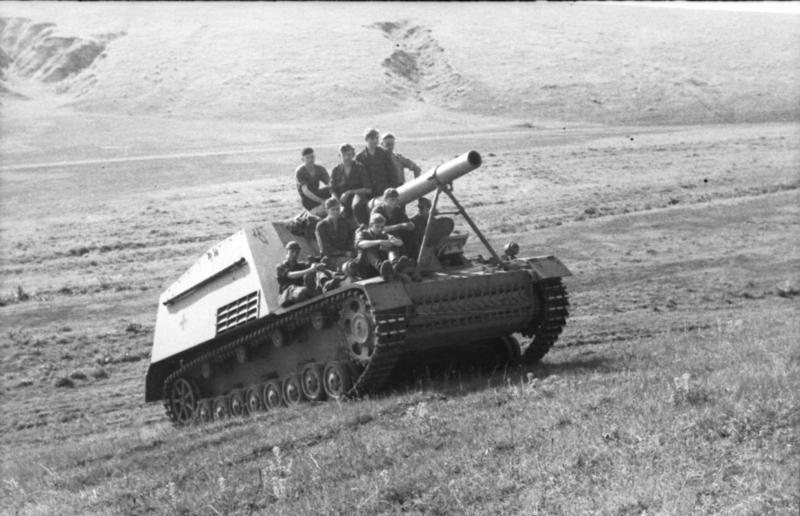
Black-and-white wartime photograph of a German Hummel self-propelled howitzer moving across open terrain with soldiers riding on it, its large 150mm howitzer in an open-topped fighting compartment.
German Hummel self-propelled howitzer. Mounting a powerful 150mm howitzer on a tracked chassis, the Hummel combined heavy firepower with mobility.
Chapter 18

The 7th Moves through Germany

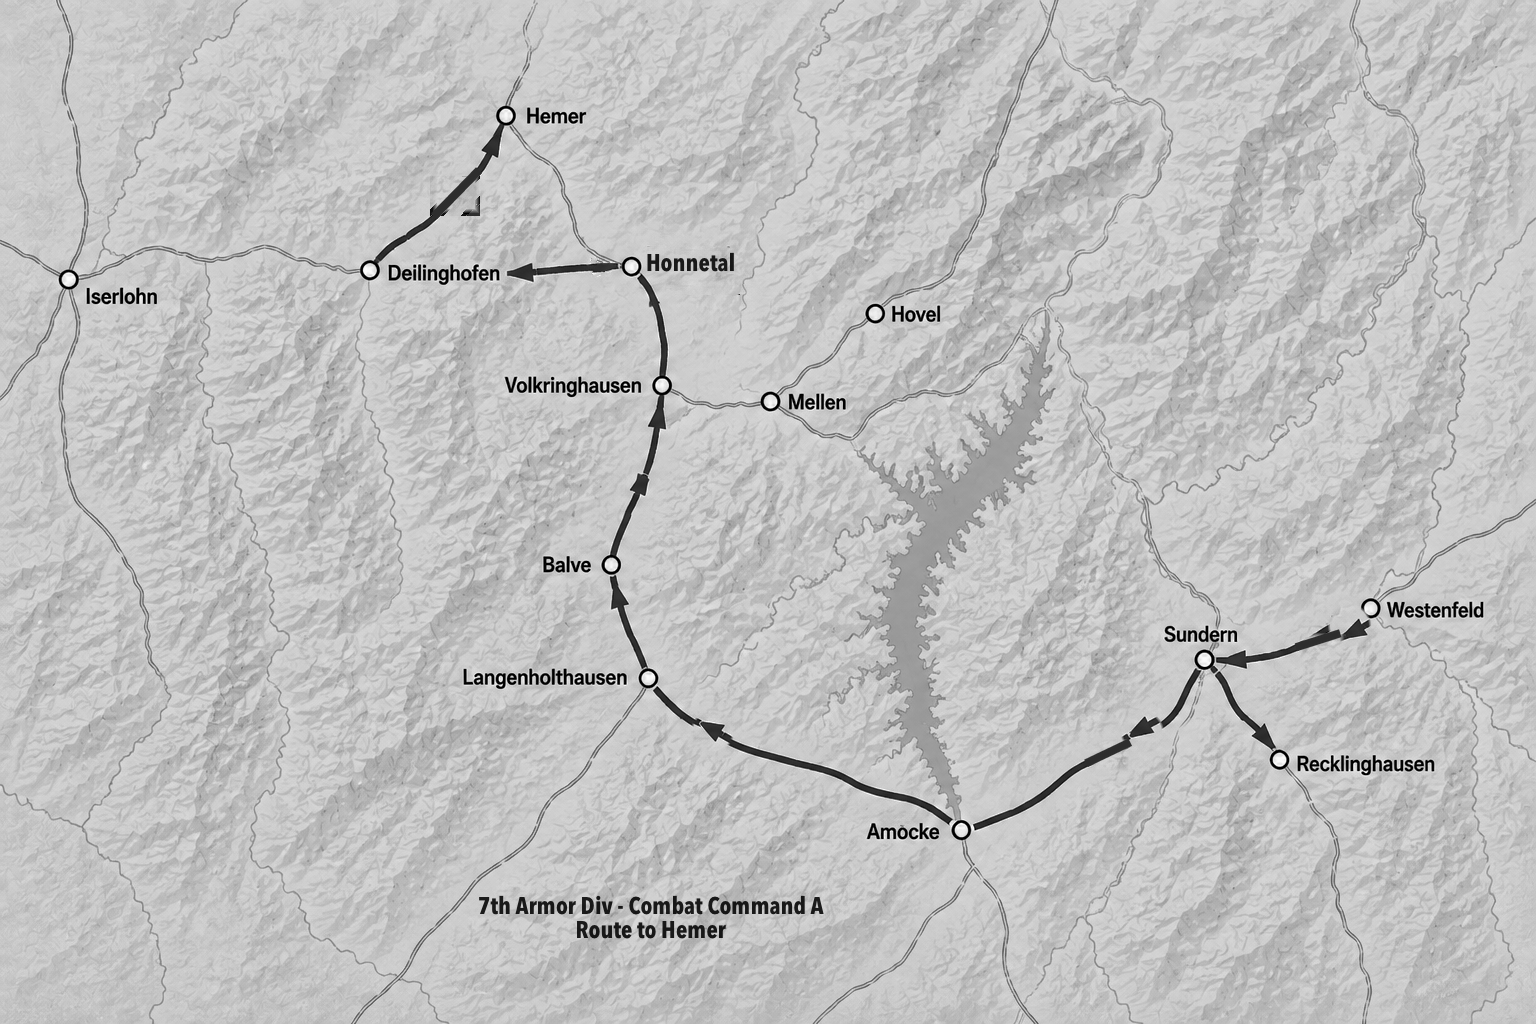
Map of the 7th Armored Division's Combat Command A route through the Ruhr Pocket from the Sundern area west through Amecke, then north through Balve and Hönnetal to Hemer.
Combat Command A's route through the Ruhr Pocket to Hemer, April 1945.
Chapter 19

Closing the Pocket

Map showing Hemer surrounded by the converging 7th Armored, 99th Infantry, and 5th Infantry Divisions during the closing of the Ruhr Pocket.
Closing on Hemer. The 7th Armored Division advanced from the east as the 99th Infantry Division approached from the west and the 5th Infantry Division from the northeast.
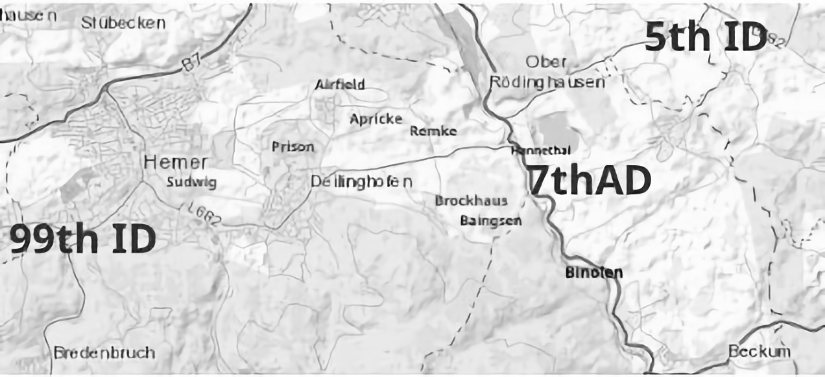
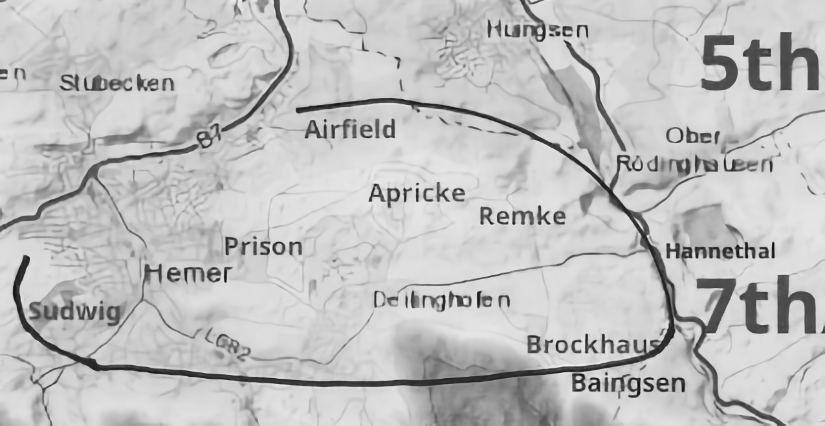
Detailed map of Hemer and surrounding towns showing the 7th Armored Division east of the city, the 99th Infantry Division to the west, and the route around Hemer during the final assault.
The final encirclement of Hemer. Elements of the 7th Armored Division closed from the east while the 99th Infantry Division approached from the west. The airfield east of Hemer became the position from which Jack's tanks and tank destroyers were prepared to support the final assault.

These are the images from the book. To read the whole story, Jack’s Story is available in every format.
Get the book

Jack’s Story

7th Armored Division Tank Commander, World War II

by John H. Wilson

© 2026 John H. Wilson.  Contact